Search Console on Google Analytics should allow you to see what keywords people are using to get your site to appear in a search. If needed, follow along with the pictures at the bottom of this article. To set this up, use the followings steps:
- Log in to Google Analytics and click on your property
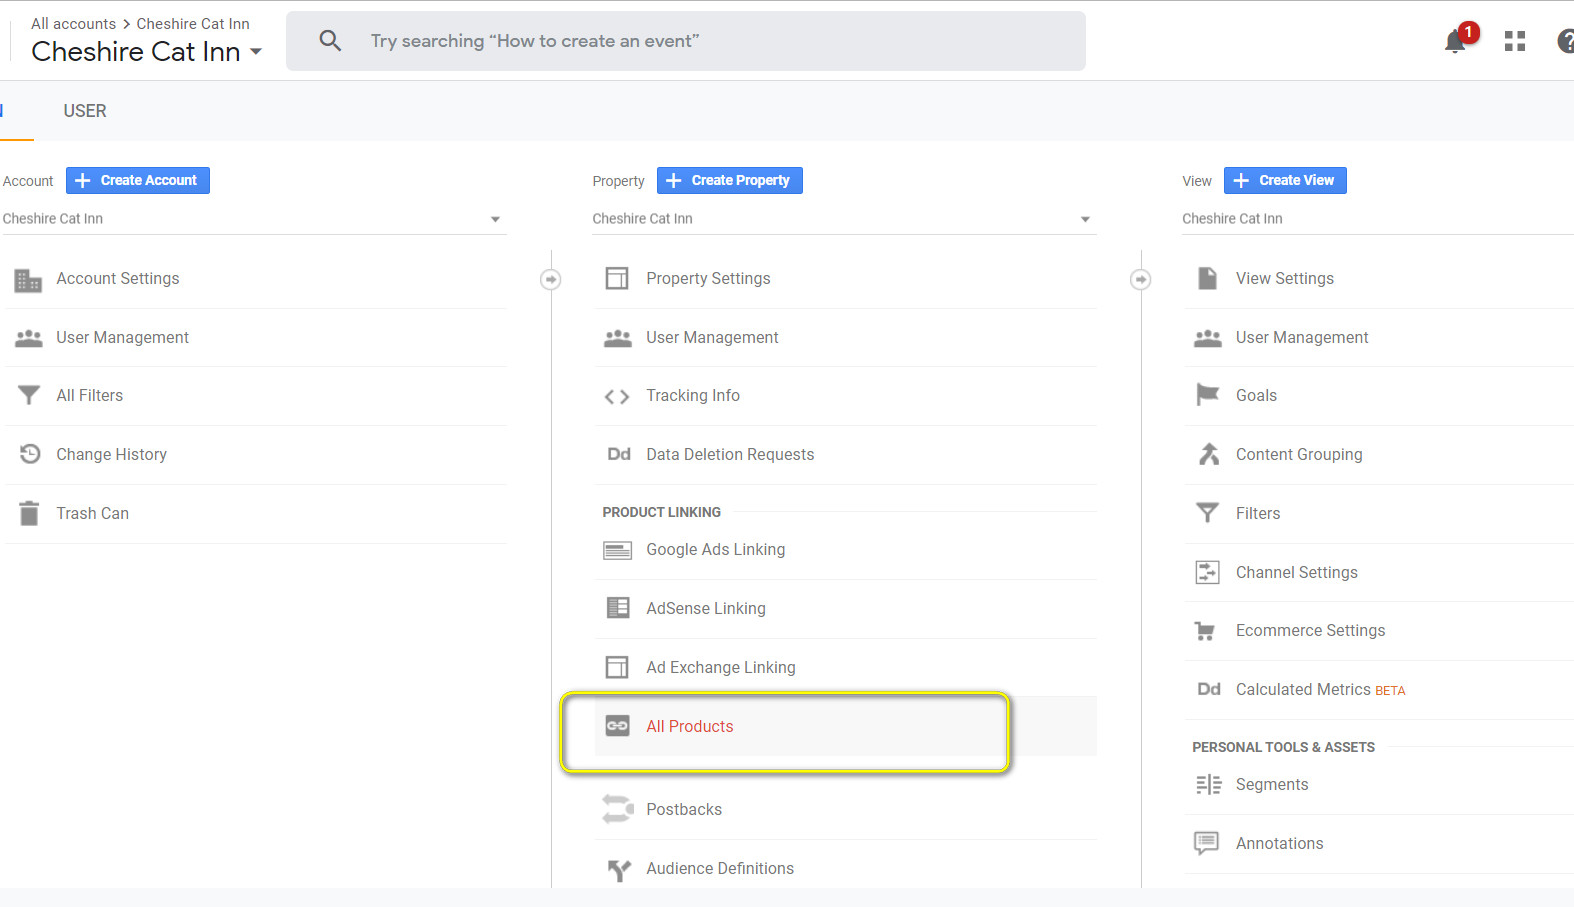
- On the bottom left side, click on Admin
- In the middle column under “Property” look down to “Property Linking” and click “All Products
- Scroll down to “Search Console” and click “Link Search Console”
- When the “Search Console Settings” page pops up, click the blue hyperlinked “Add” button
- For the “Enable Search Console data in GA” look at the bottom and click “Add a site to Search Console” so it shows up in a new tab.
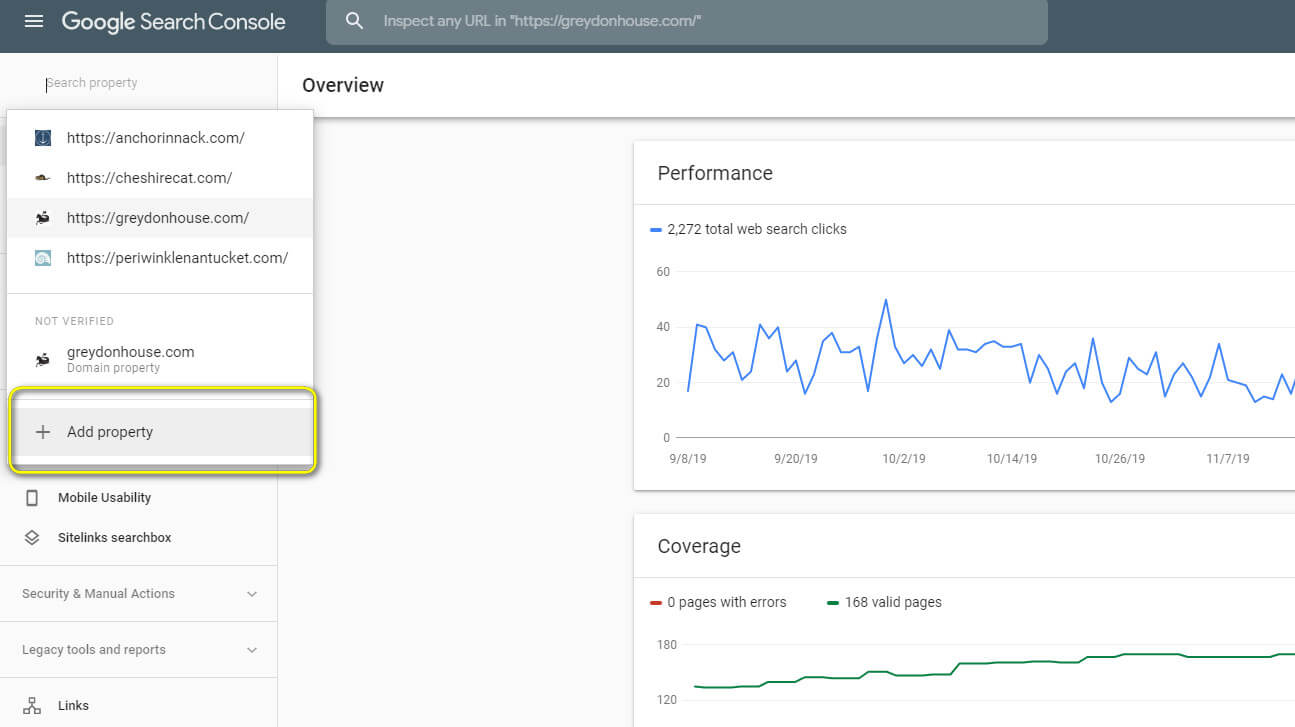
- When the Google Search Console page opens, go to the top left and click “Search Property” then scroll down to ” + Add Property”
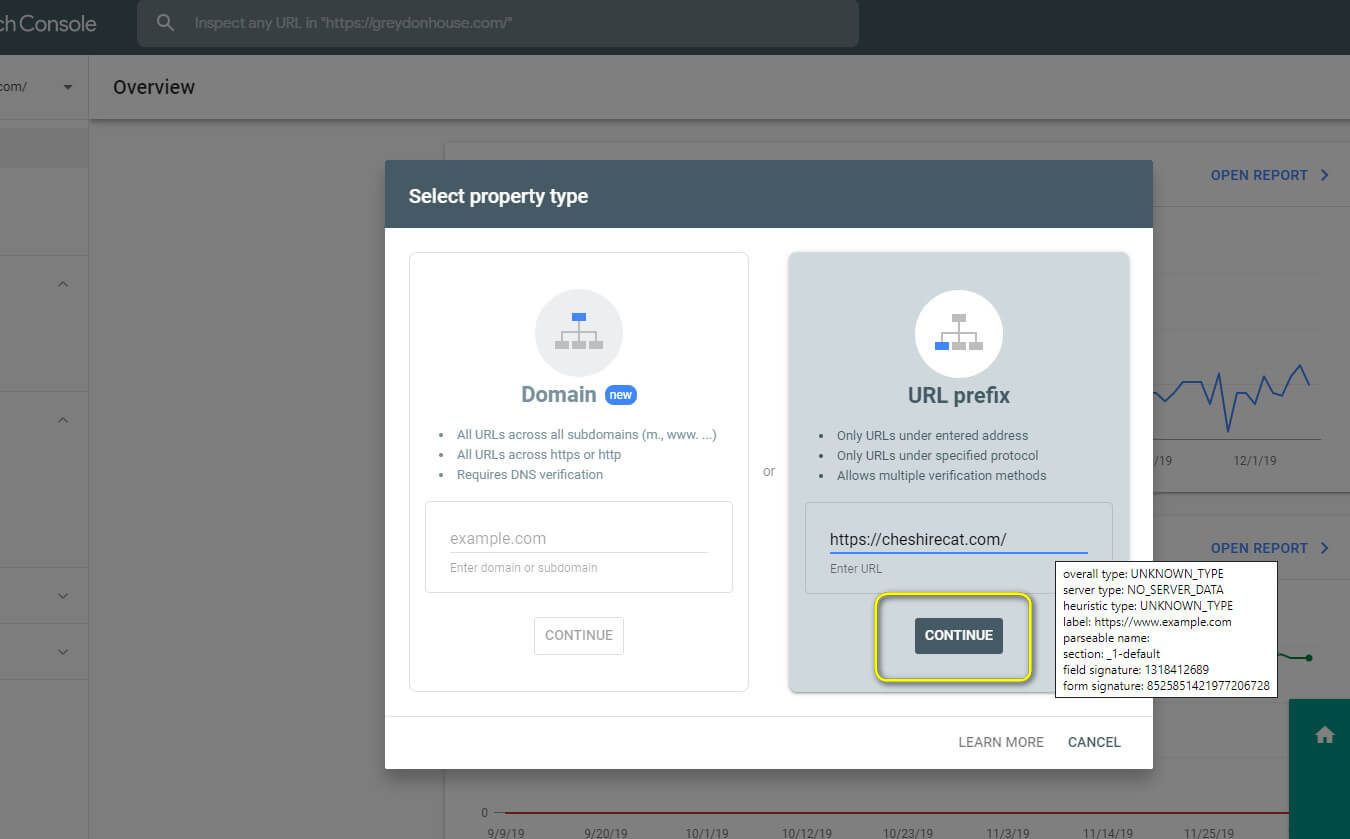
- For “Select Property Type,” copy and paste the client’s homepage URL into the “URL Prefix” box. Hit “Continue”
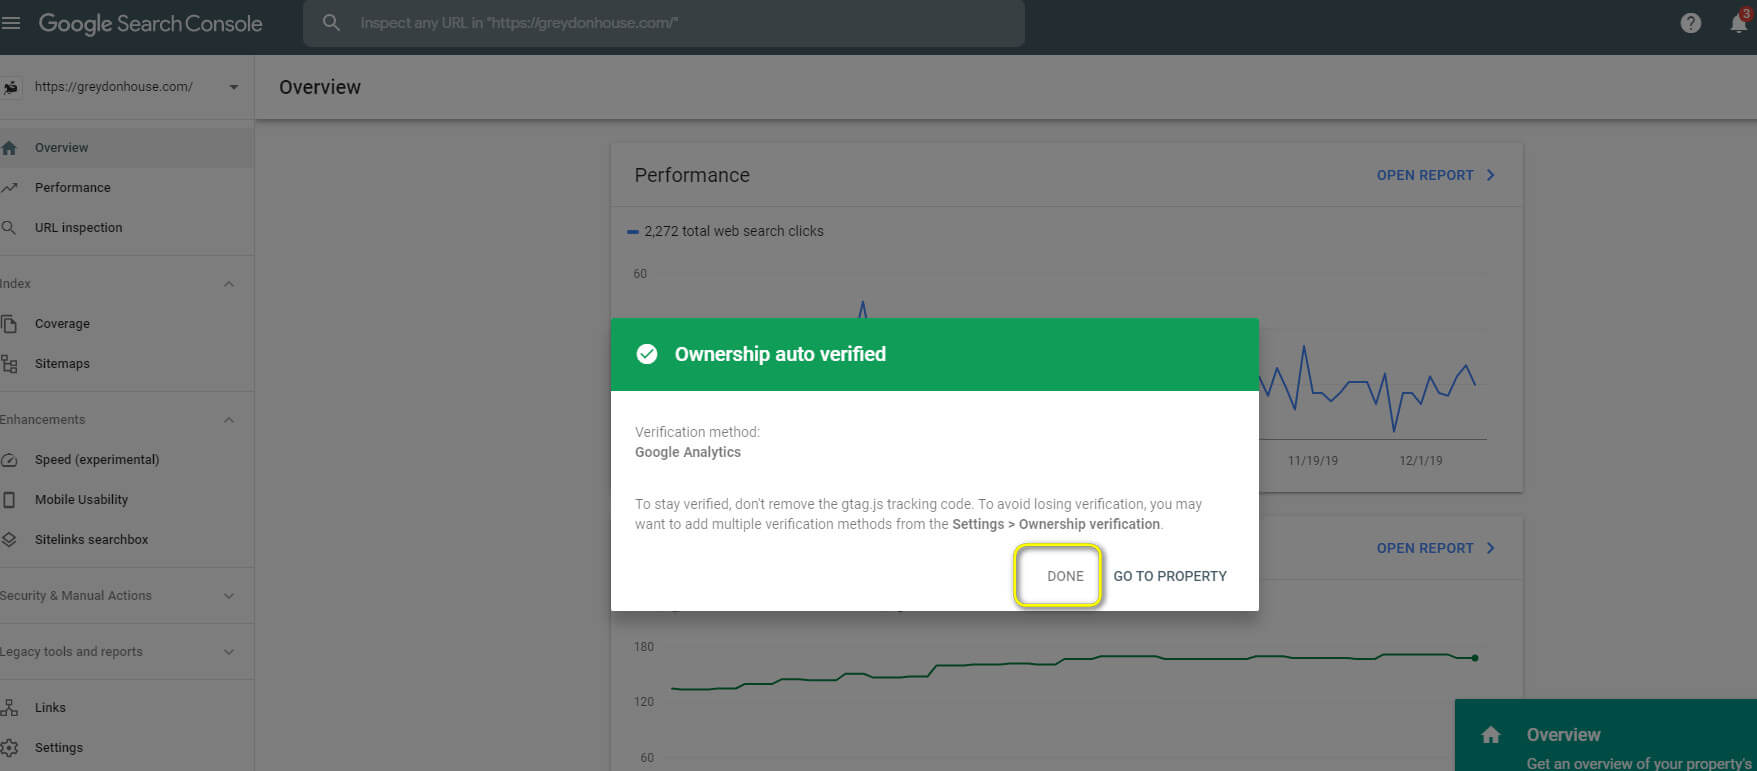
- Once the auto verified ownership box pops up, hit done.
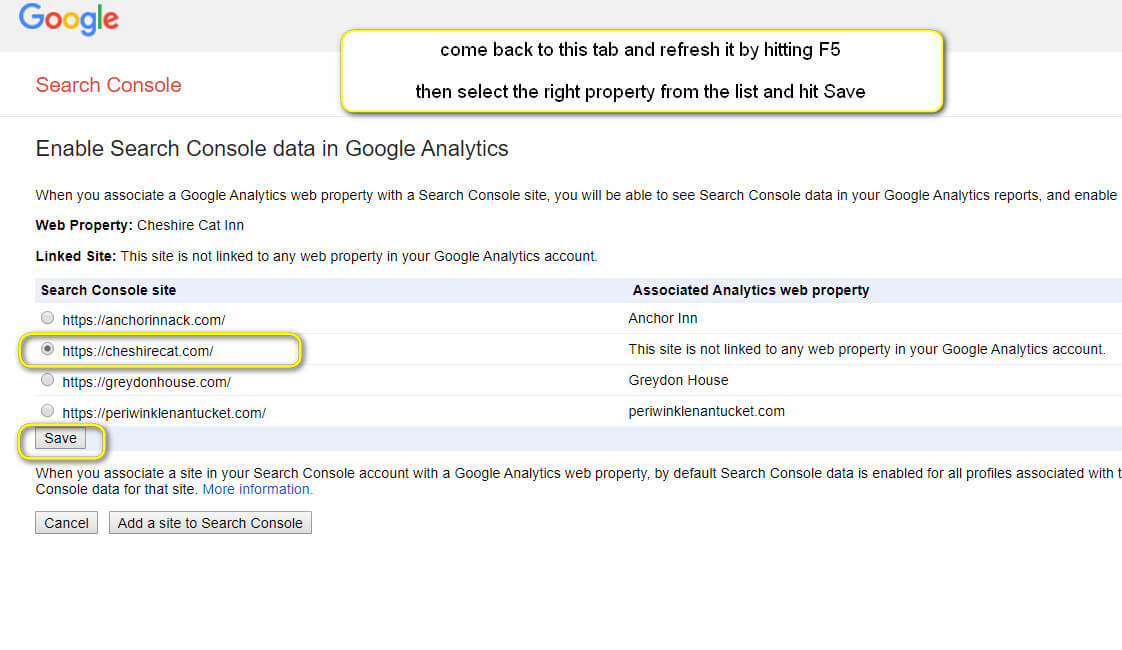
- Return to the “Enable Search Console data in GA” tab, hit refresh.
- Your property should now appear as an option under the “Search Console site” list. Select the property and hit “Save.”
This should be all you need to add the Search Console feature to GA. Make sure to go back a few days later to double check that the feature is working properly.