
- Log in to customers Active Campaign (AC) account – list of all AC accounts
- On the lefthand site go to Site -> Forms -> Create a form
-
- name the form (vacation guide, wedding guide, vacation itinerary, newsletter, etc.) and select action from the dropdown:
- Add to list – select the type of contacts list you will be building (vacation guide wedding list, vacation itinerary, newsletter ). If no list is available see 7. on how to create a list in AC.
- Add a tag – Select a tag you would want to attach to contacts coming from this form – this step is not required but could be helpful when creating a segmented contact list
- click create form
- name the form (vacation guide, wedding guide, vacation itinerary, newsletter, etc.) and select action from the dropdown:
- 3. Once created open the form and adjust settings on the right-hand side.
-
- Fields section – Adjust the fields included in the form if needed. For a vacation guide, typically we’ll collect Email (required), First name and Last name
- Style Section – Style the form using the customer’s branding colors and fonts or matching them as close as possible. Make sure the button is styled similar to the buttons on the website (border, rounded, squared, etc.) Make sure the Form’s Background is styled to be transparent.
- Options Section – you should have created a thank you landing page in WP. If not, here are a few examples
- In the options section – On submit -> select Open URL and link to thank you landing page.
- In the Form Action section click on the Settings (gear icon) and make sure Opt-in Confirmation is set to OFF
- Click Integrate in the top right corner. Copy the top line of the code and embed it in the website’s landing page where you would like to include the form.

4. Go back to the home AC screen and click on the Settings (gear icon in the bottom left corner):
-
- Select the Tracking tab and enable Site Tracking. Add homepage of the website in the Add website URL section in the middle of the page and check. Include All Pages checkmark
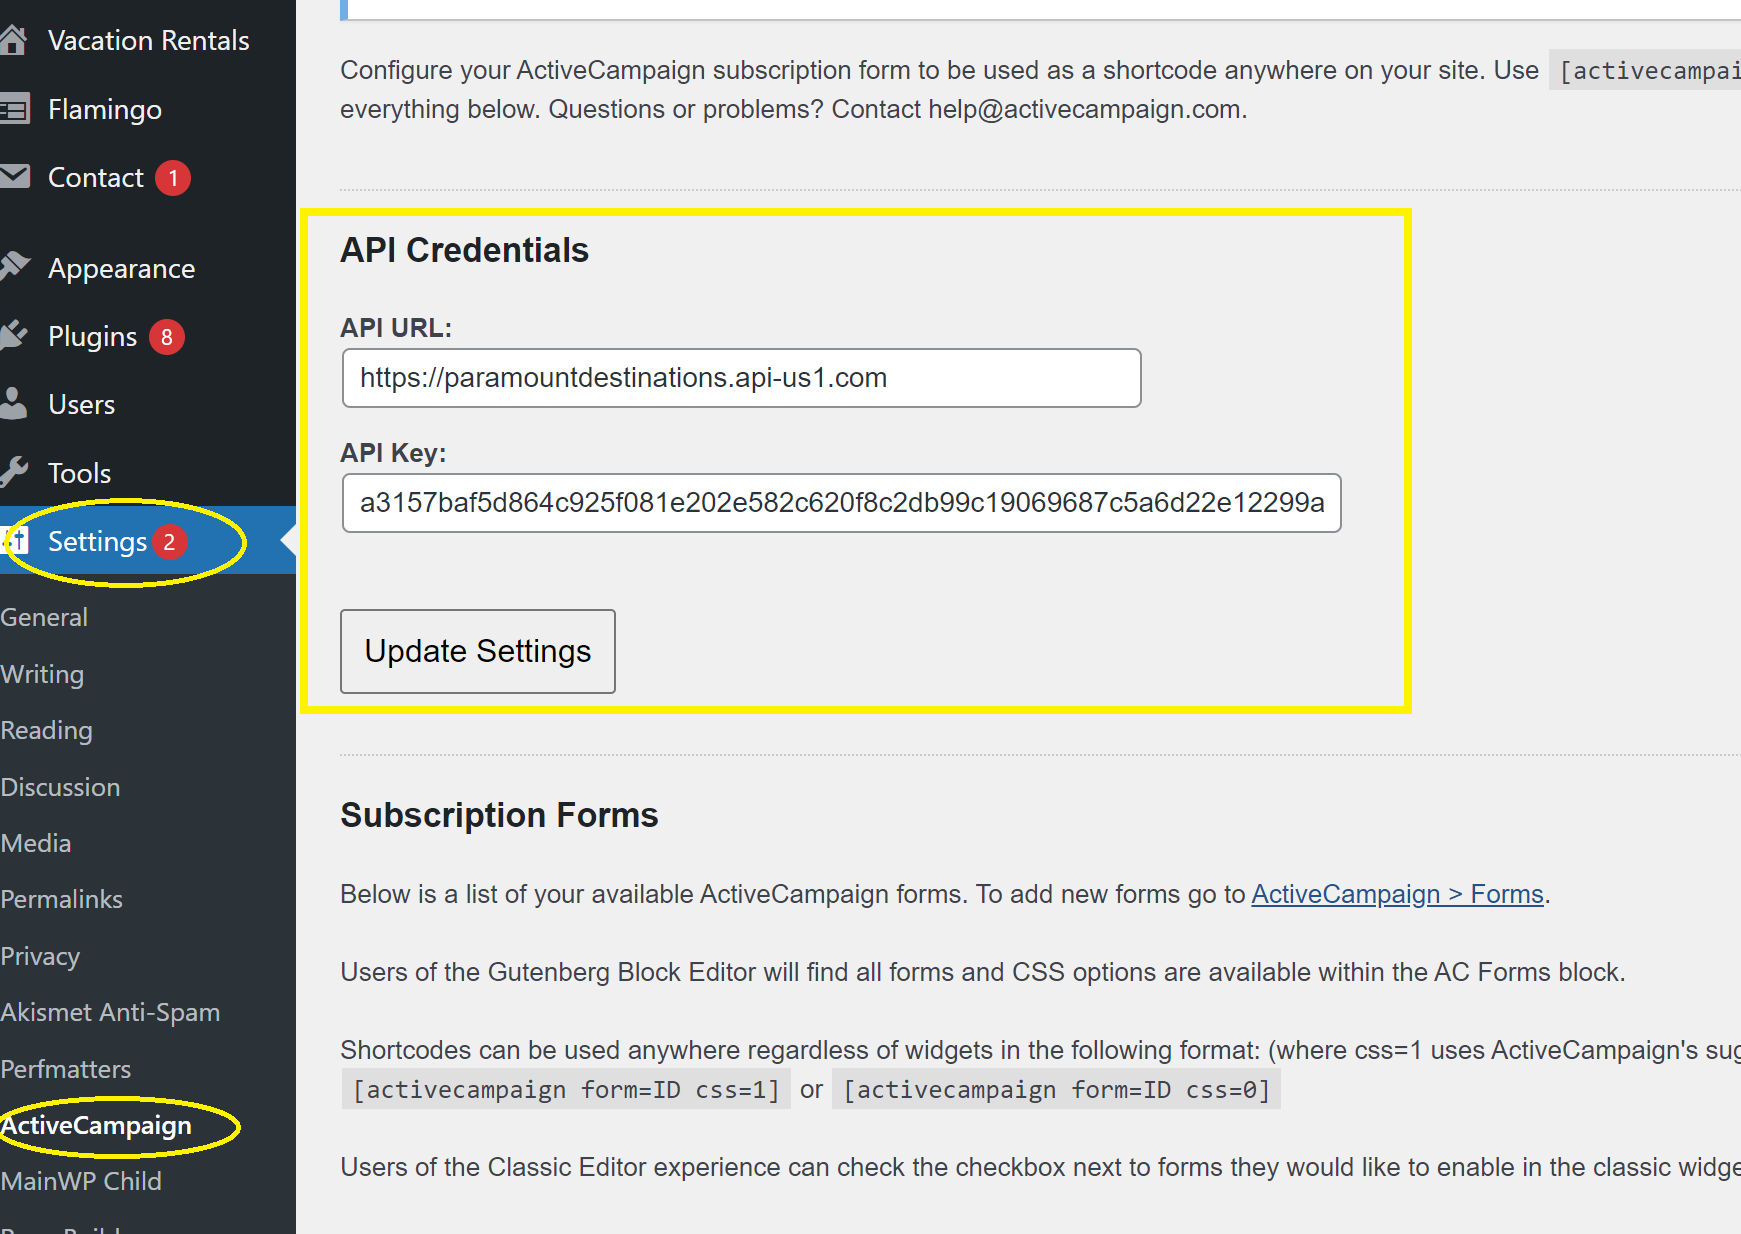
- Select Developer Tab. Copy and Paste information about IPA credentials in WP Settings -> Active Campaign -> API credentials
5. Create Goal in Google Analytics. Tips on how to create a goal in Analytics can be found here.
6. Test by filling out the form and asking the CSM to test the form as well. You should see your email added to the VG guide contact list.
Important: When setting up the On Submit URL often times we would complete the AC form set up while Vacation Guide is still in demo. Make sure to update the link once the VG goes live and TEST.