
We have an annual contract with Getty Images we can use to download photos for blogs, social media, website design and the Vacation Guide. Clients will be charged if we download more than 4 images for use for their website design. More on that later!
A Few Important Details About Our Getty Image Account
- We can download images under the Premium Access package only. If you are ever prompted to purchase something, first sign out/sign in again and make sure you are using the Premium Access filter. If that doesn’t work, contact Allison.
- Our current annual contract began 5.24.17 and is for 3,000 images.
- THIS IS NOT AN UNLIMITED CONTRACT.
- We charge clients when we use more than 4 for their website. Read more about our Getty Image Pricing for Customers.
- Any image you download from Getty Images needs to be labeled and uploaded to the Q4Photo Bank for others to use.
- Our Premium Access account gives us access to a ton of incredible images. We can use “editorial use only,” as well as royalty free, rights managed images, etc. Photo credits are not necessary.
Need a photo? Try the Q4 Photo Bank first
If you need a photo, please go to the Q4Photo Bank first. We have a huge library of images that have been labeled and organized by category. Client images are also stored in the Photo Bank. If you don’t see a folder for your client (should contain images of the property, rooms, common area, destination), ask the CEM.
Can’t find what you need? Go to Getty Images
If you can’t find anything in the Photo Bank that will work, head on over to the Getty Images site and follow the following instructions:
- Get the login info from your manager.
- Once you log in, type in a search term.
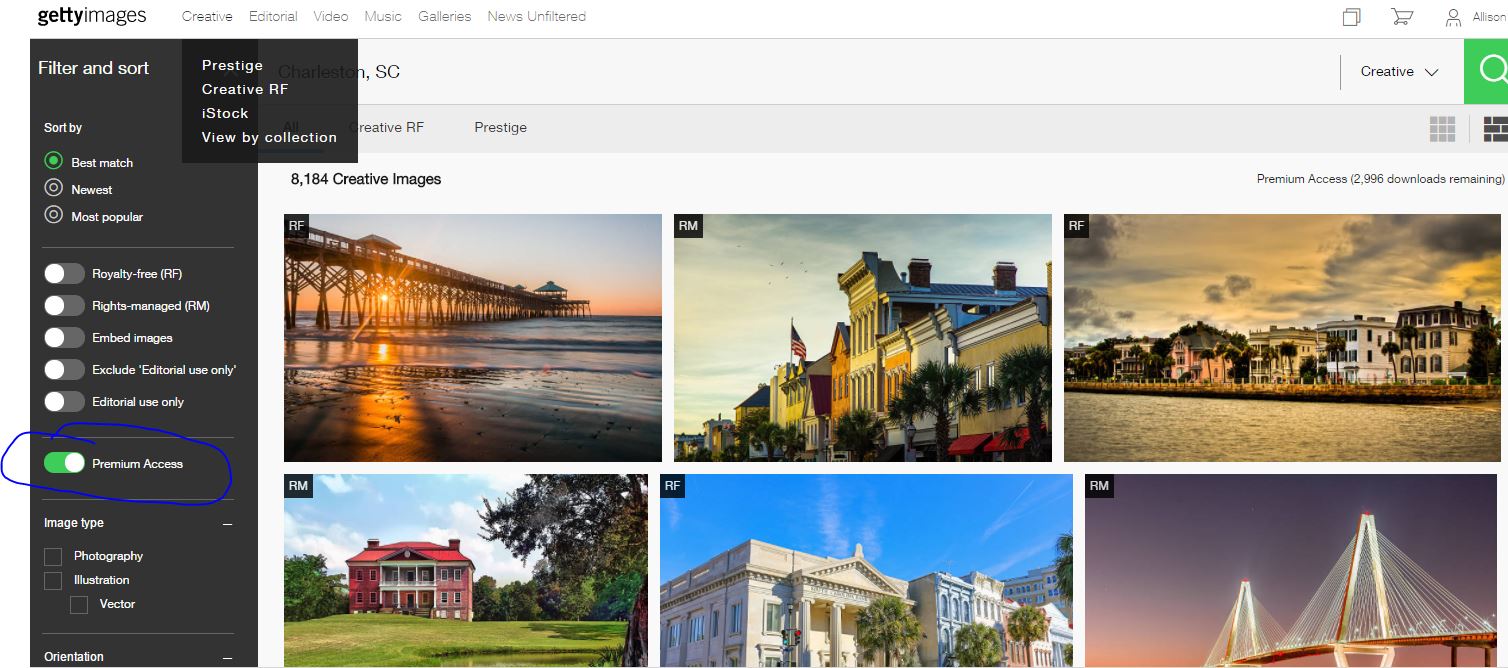
- When the results appear, make sure that you filter the images using Premium Access. Click on Filter and Sort in the top left corner, then select Premium Access when the option appears.
- Select the image you would like to use and then download a MEDIUM size image.
- If you are ever prompted to purchase something, DO NOT DO IT. 🙂 Instead, sign out/sign in again and make sure you are using the Premium Access filter. If that doesn’t work, contact Allison.
- Once you’ve downloaded the image, rename it. The name should represent what is actually depicted in the photo and include the keyword, if possible.
- You’ll also need to resize it to 1500 px horizontal. Our hero images are 1500 x 608. Resize using Paint, PicMonkey, Canva, whatever you like.
- Upload the image to the appropriate folder in the Q4 Photo Bank.
- Upload the image to WordPress. Don’t forget to fill in Alt Text.
How to Upload a Photo to the Q4 Photo Bank
There are two ways to upload photos to the Q4 Photo Bank.
- Open the folder on your computer marked “Downloads.”
Next, open the Q4 Photo Bank on the Drive. Select the folder on the Drive to which you’d like to upload your photo and double click to open it.
Now drag the photo from your “Downloads” folder (or wherever you have the pics stored on your computer) into the folder on the Drive. Voila!
- Open the Photo Bank on Drive.
Open the appropriate folder.
Select New on the top left corner.
Then select File Upload.
A window will pop up and you can select the image you’d like to upload from your desktop or Downloads folder.
Select the image, then click OPEN and voila!
***Be sure to label the photo you are saving so it can be identified by others easily. Also be sure to load it into an appropriate folder. Create one if you need to!