
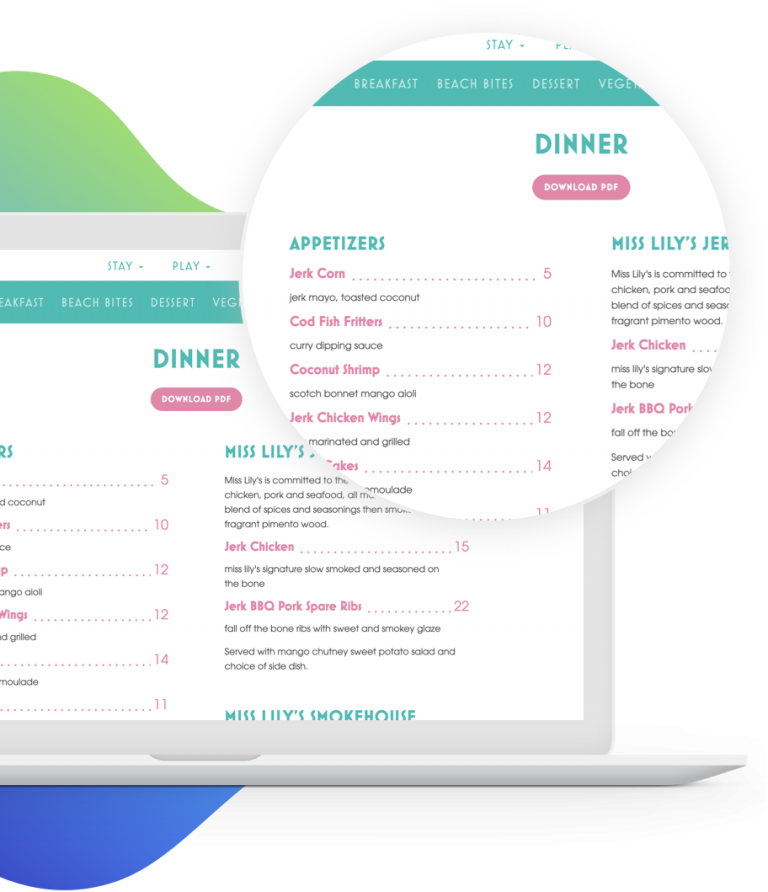
Framework-Wide Feature: Restaurant Pages allow us to quickly apply a unique page template to otherwise ordinary pages to include restaurant menus. You can view this feature in action on Skylark Negril's "Eat" page.
HOW TO ENABLE THE Q4 RESTAURANT MENU
To enable the Q4 Restaurant Menu page template go into the Admin menu > Customize > Q4 Future Proof™️ Features > Q4 Restaurant Menu Template and click the checkbox next to "Enable Q4 Restaurant Menu Template".
SETTING UP THE MENU
After enabling the Q4 Restaurant Menu feature go into the WordPress Dashboard > Pages > Create a new Page > Select Restaurant Menu Page page template option.
The new template option provides the Menu advanced custom fields that let you set up the different menus (ie breakfast, lunch, dinner) and the sub sections and menu items.
Menu Settings
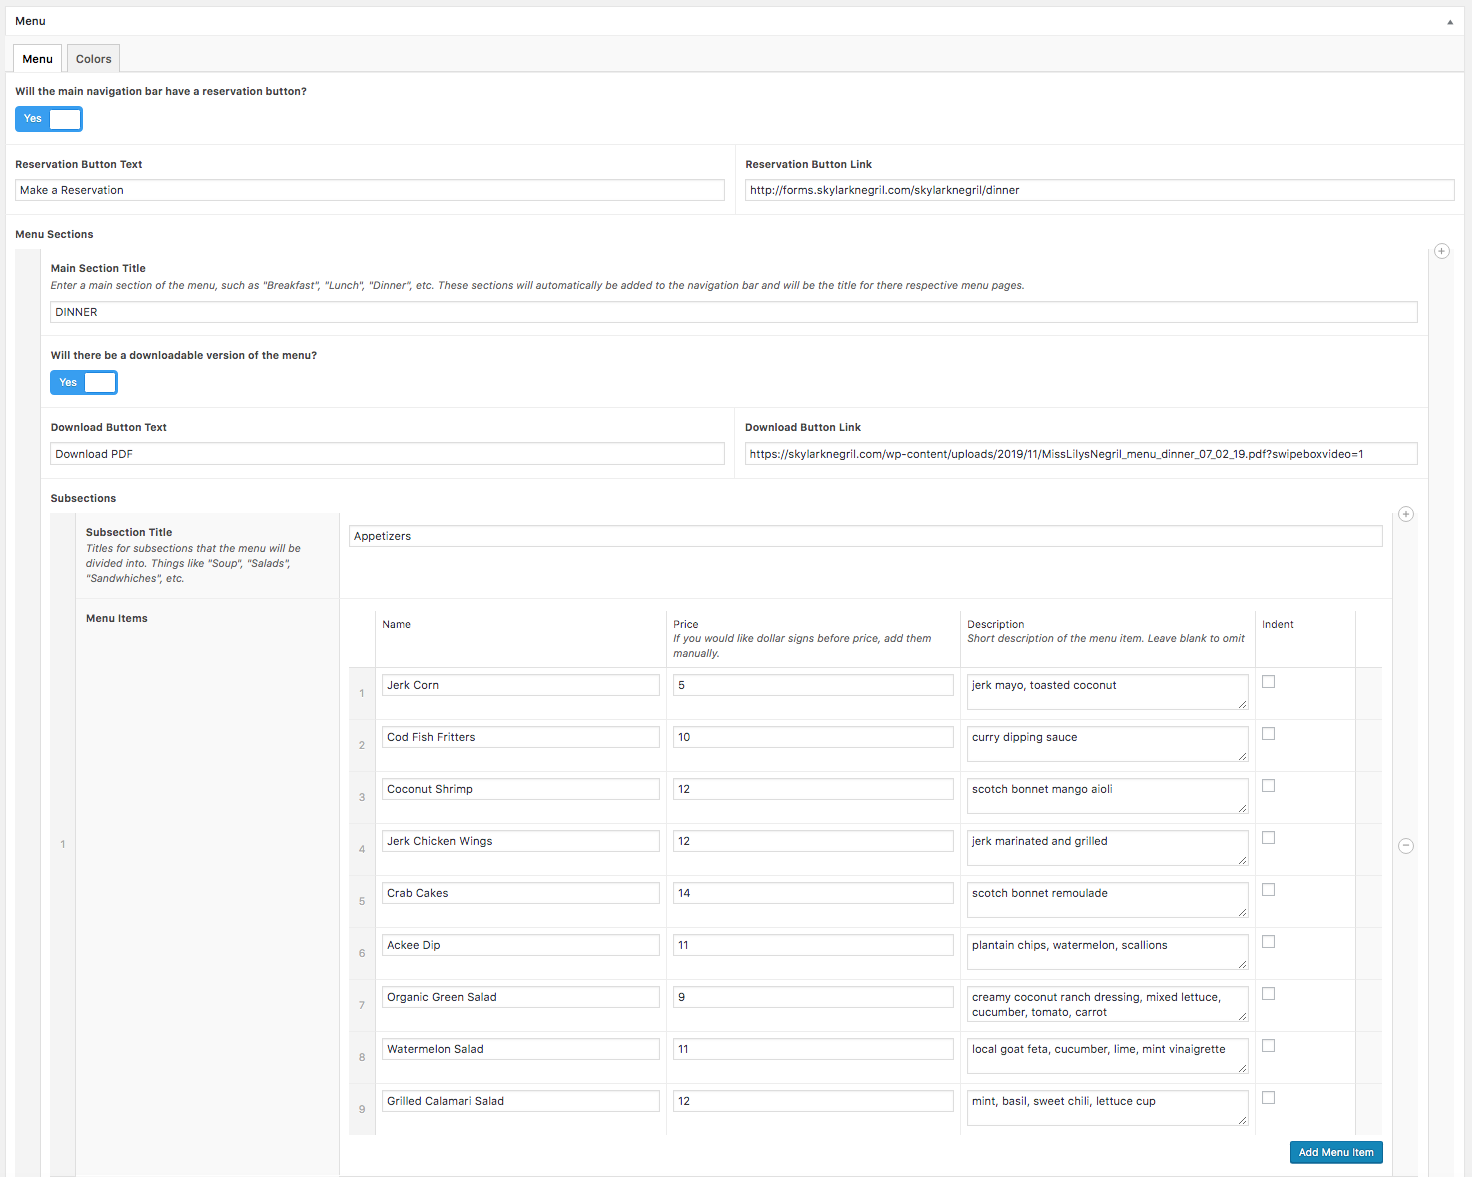
Reservation Option:
Enabling this feature allows customers to make reservations. You can control the Reservation Button text and link to the reservation platform.
Main Sections:
Enter a main section of the menu, such as "Breakfast", "Lunch", "Dinner", etc. These sections will automatically be added to the navigation bar and will be the title for there respective menu pages. To create a main section click on the the blue Add Main Menu Section
Main Section Title: Controls the title for the Section Page title and the Custom Navigation menu button.
Download Menu Option: Enabling this feature allows the customer to download a PDF version of the menu. You can control the Download Button Text and link to PDF download.
Subsections:
Subsections are the different section within the menu. For example, Appetizer, Soups, Beverages, Main Dishes, Salads, etc. Subsections house the different menu items. To create a subsection click on the the blue Add Menu Subsection
Subsection Title: Sets the title for the subsection (ie Appetizers).
MENU ITEMS:
Menu items are the different dishes provided within the subsections. For example, under the Appetizer Subsection you may see Fried Green Tomatoes. To create a new Menu Item click on the blue Add Menu Item button.
Name: Names the menu item.
Price: Sets the price for the menu item.
Description: Add a description for the menu item
Indent: Select if you want the menu items to be indented under the Subsection title
CUSTOM COLORS
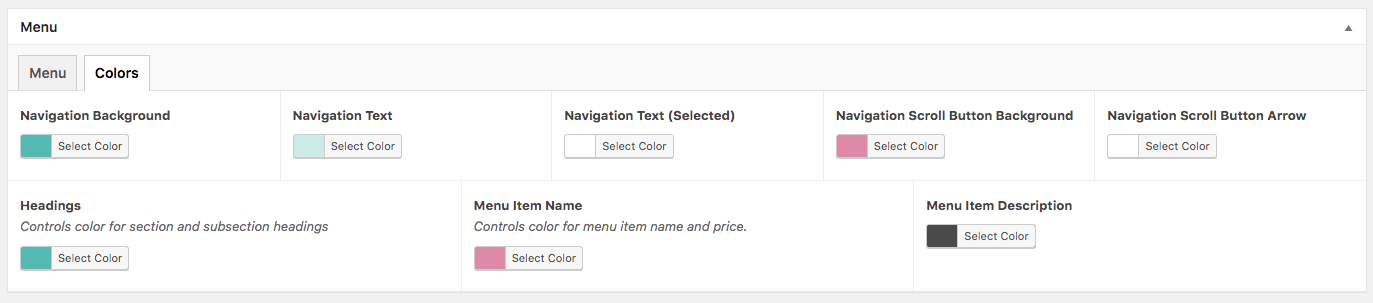
You can add custom brand colors to your menu text, headings, buttons and navigation menu. To enable this option (default setting is not enabled) go to the Custom Colors section and click on the enable switch. Enabling this option will provide you with the options to set custom brand colors.
NOTE: The Navigation Scroll shows on mobile/tablet views only.