
There are 4 sections of the plugin settings that need to be set up (some with multiple tabs). We will go through each one below:
- Access Settings
- Q4 VR General Settings
- API Settings
- API Preferences
- Download Property Images
- Custom Messaging
- Search Page
- Property Page
- Booking Page
- Search Form Settings
- Basic Search
- Advanced Search
- Choose Amenities
- Search Options
Before starting these steps, you need to:
- Install the latest plugin and activate it.
- Set up a HUB account for your customer if you haven’t already. Create an API key that you can add in the VR Plugin Settings. Make sure you copy your API key because you cannot see it after the pop-up is closed.
Access Settings
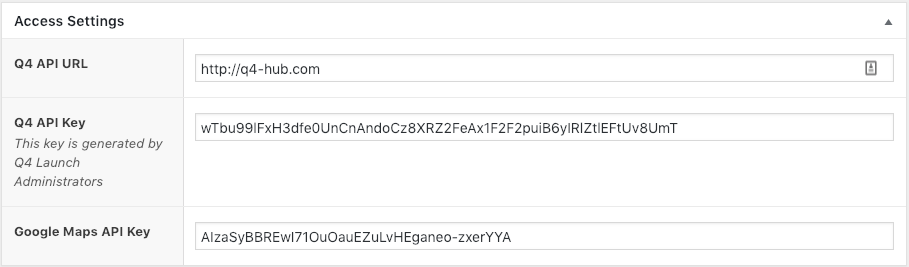
This is where you add your HUB API Connection and your Google Maps API Key.
Q4 API URL: This will always be http://q4-hub.com unless you are using a development version of the HUB for testing purposes.
Q4 API Key: This is the API Key you created in your customer’s HUB account.
Google Maps API Key: You create this API key when you add a new project to our Google Dashboard.
Q4 VR General Settings
API Settings
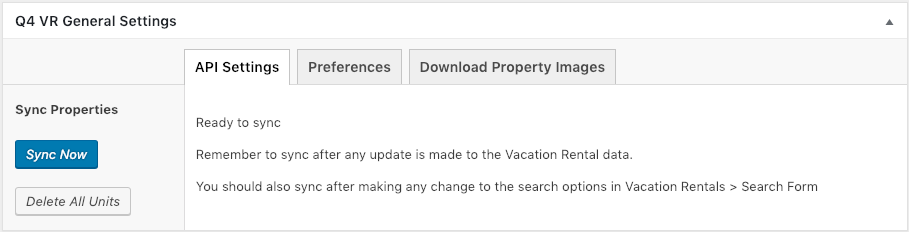
Clicking Sync Now here will import all of your customer’s properties. It is best to complete the Choose Amenities section in the Search Form Settings first because that sets up the filters that will automatically be applied to your units during the sync. You must have your Access Settings set up for the Sync Now button to be available.
DO NOT click the Delete All Units button. This add all of your units to the trash.
Preferences
There are a lot of options here, so I will break it down into sections.
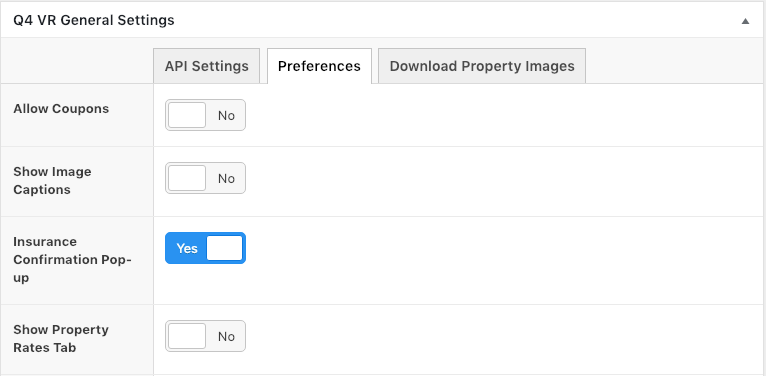
- Allow Coupons: If your customer accepts coupon codes, toggle to Yes.
- Show Image Captions: Display images captions on property page images. ** Note: This feature is not yet available for all Property Management Systems. Before offering this feature to a customer, confirm with Rich and the development team that it is available in your customer’s PMS. (Works in Escapia, V12 and VRM, need to prove on others). KB Article: https://kb.q4launch.com/q4vr-image-caption-feature/
- Insurance Confirmation Pop-Up: Display pop-up on Booking Page when a customer declines insurance coverage. KB Article: https://kb.q4launch.com/q4vr-insurance-confirmation-pop-up/.
- Show Property Rates Tab: Toggle to Yes, to display a rates tab on your property pages. This is not available for V12 Customers. KB Article: https://kb.q4launch.com/vr-feature-rates-table/.
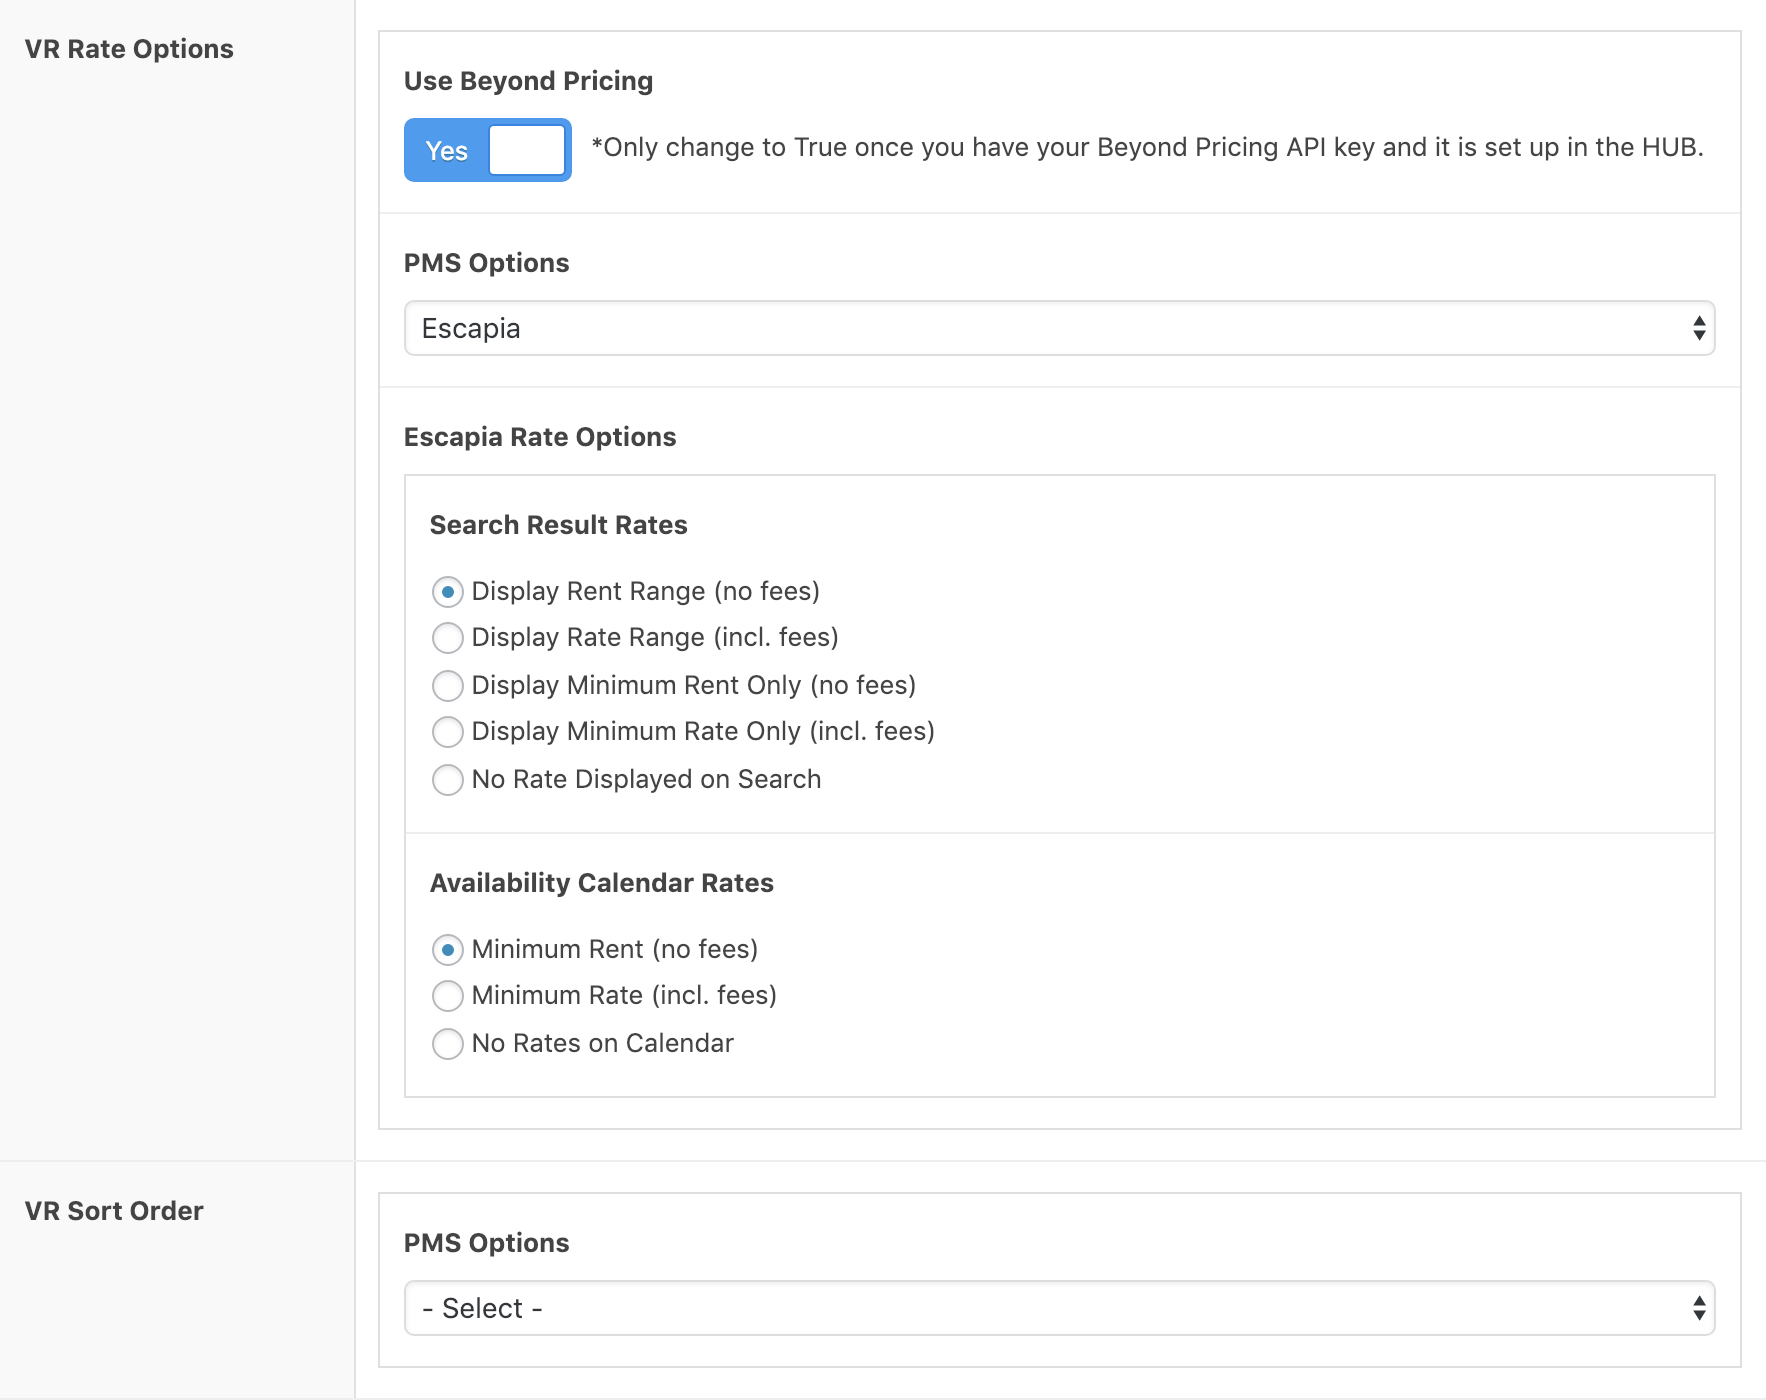
- VR Rate Options: On setup, select the PMS used by the customer. Adjust the rate options available for that PMS as necessary. KB Rate Details Article: https://kb.q4launch.com/q4vr-how-rates-work/.
- By default, Beyond Pricing is turned off. Only turn this on once you have added your API key to the HUB. Resync properties when you turn this on. KB Beyond Pricing Article: https://kb.q4launch.com/q4vr-using-beyond-pricing-for-availability-calendar/.
- VR Sort Order: The default sort order for the search results page is Random. If your customer requests a different type of sort order for their search results, you can select from the options here. Once you select your PMS (Barefoot, Escapia, Streamline, V12), the sort options will display below your PMS Options. KB Article: https://kb.q4launch.com/q4vr-setting-up-sort-options/.
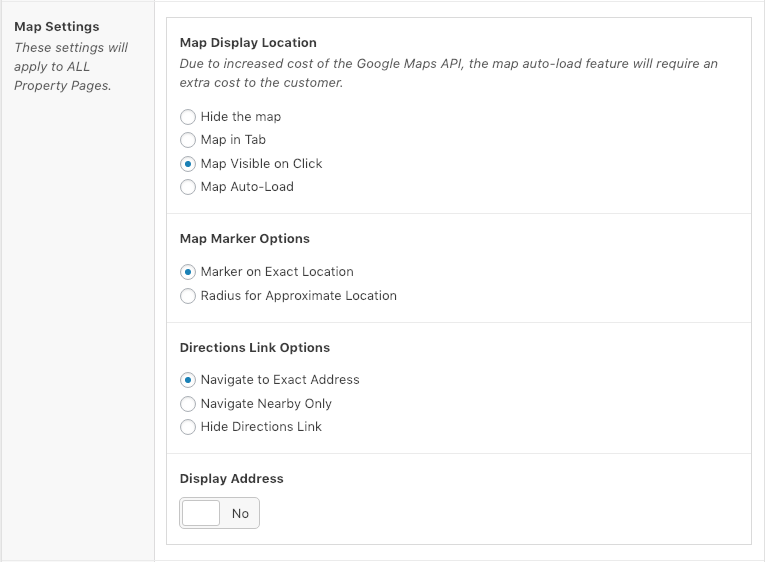
- Map Settings: These are the options for showing the exact location of a property on your site. Some customers don’t want users who don’t book the property to know the exact location.
- Map Display Location: This determines where on the property page the map will display.
- Map Marker Options: This determines how the marker on the map on the property page displays.
- Directions Link Options: This determines where the “Get Directions” button takes you when it links you to Google Maps.
- Display Address: Toggle Yes if you want to exact Address to show in the header for the Property (the box with the name and Get Directions button). This was primarily added for Seaside Vacations.
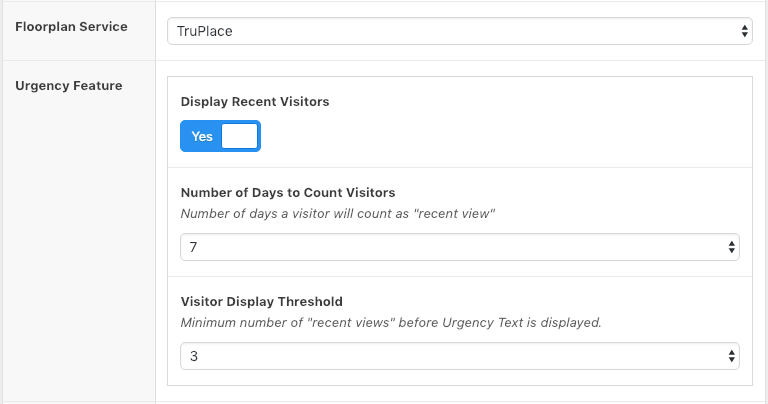
- Floorplan Service: There are two Floorplan Service Options: TruPlace and Matterport. If you select “TruPlace” of “Matterport” here and the property has a media link in the API return, a Floorplan tab will display on the property page. KB Article: https://kb.q4launch.com/q4vr-floorplan-options/.
- With TruPlace, when a user clicks the Floorplans tab, the Truplace viewer will pop up almost the full size of the browser window. For the TruPlace Floorplan to display correctly, it needs to be entered like this: https://tour.TruPlace.com/property/1292/56776/. Do NOT include any other code other than the link in the field or it won’t display correctly. Also, it MUST be a TruPlace link. For a different type of video, add it to the Property Post in the Vacation Rental tab.
- With Matterport, the viewer will display within the boundaries of the tab in the browser, but the user can click the full screen option within the Matterport view to expand it. For the Matterport Floorplan to display correctly, it needs to be entered like this: https://my.matterport.com/show/?m=3PUYRWuaL7p. Do NOT include any other code other than the link in the field or it won’t display correctly. Also, it MUST be a Matterport link. For a different type of video, add it to the Property Post in the Vacation Rental tab.
- Urgency Feature: This will display the number of recent visitors to a property page. KB Article: https://kb.q4launch.com/q4vr-urgency-feature/.
- Display Recent Visitors: If this is set to NO, the other two fields will not display. This turns on the urgency feature.
- Number of Days to Count Visitors: This is the number of days a visitors information will be stored as a recent visitor. When it says, “X number of people have recently viewed this page”, this field defines “recently”.
- Visitor Display Threshold: This is the number of people that need to view a property before the urgency feature will display on the screen.
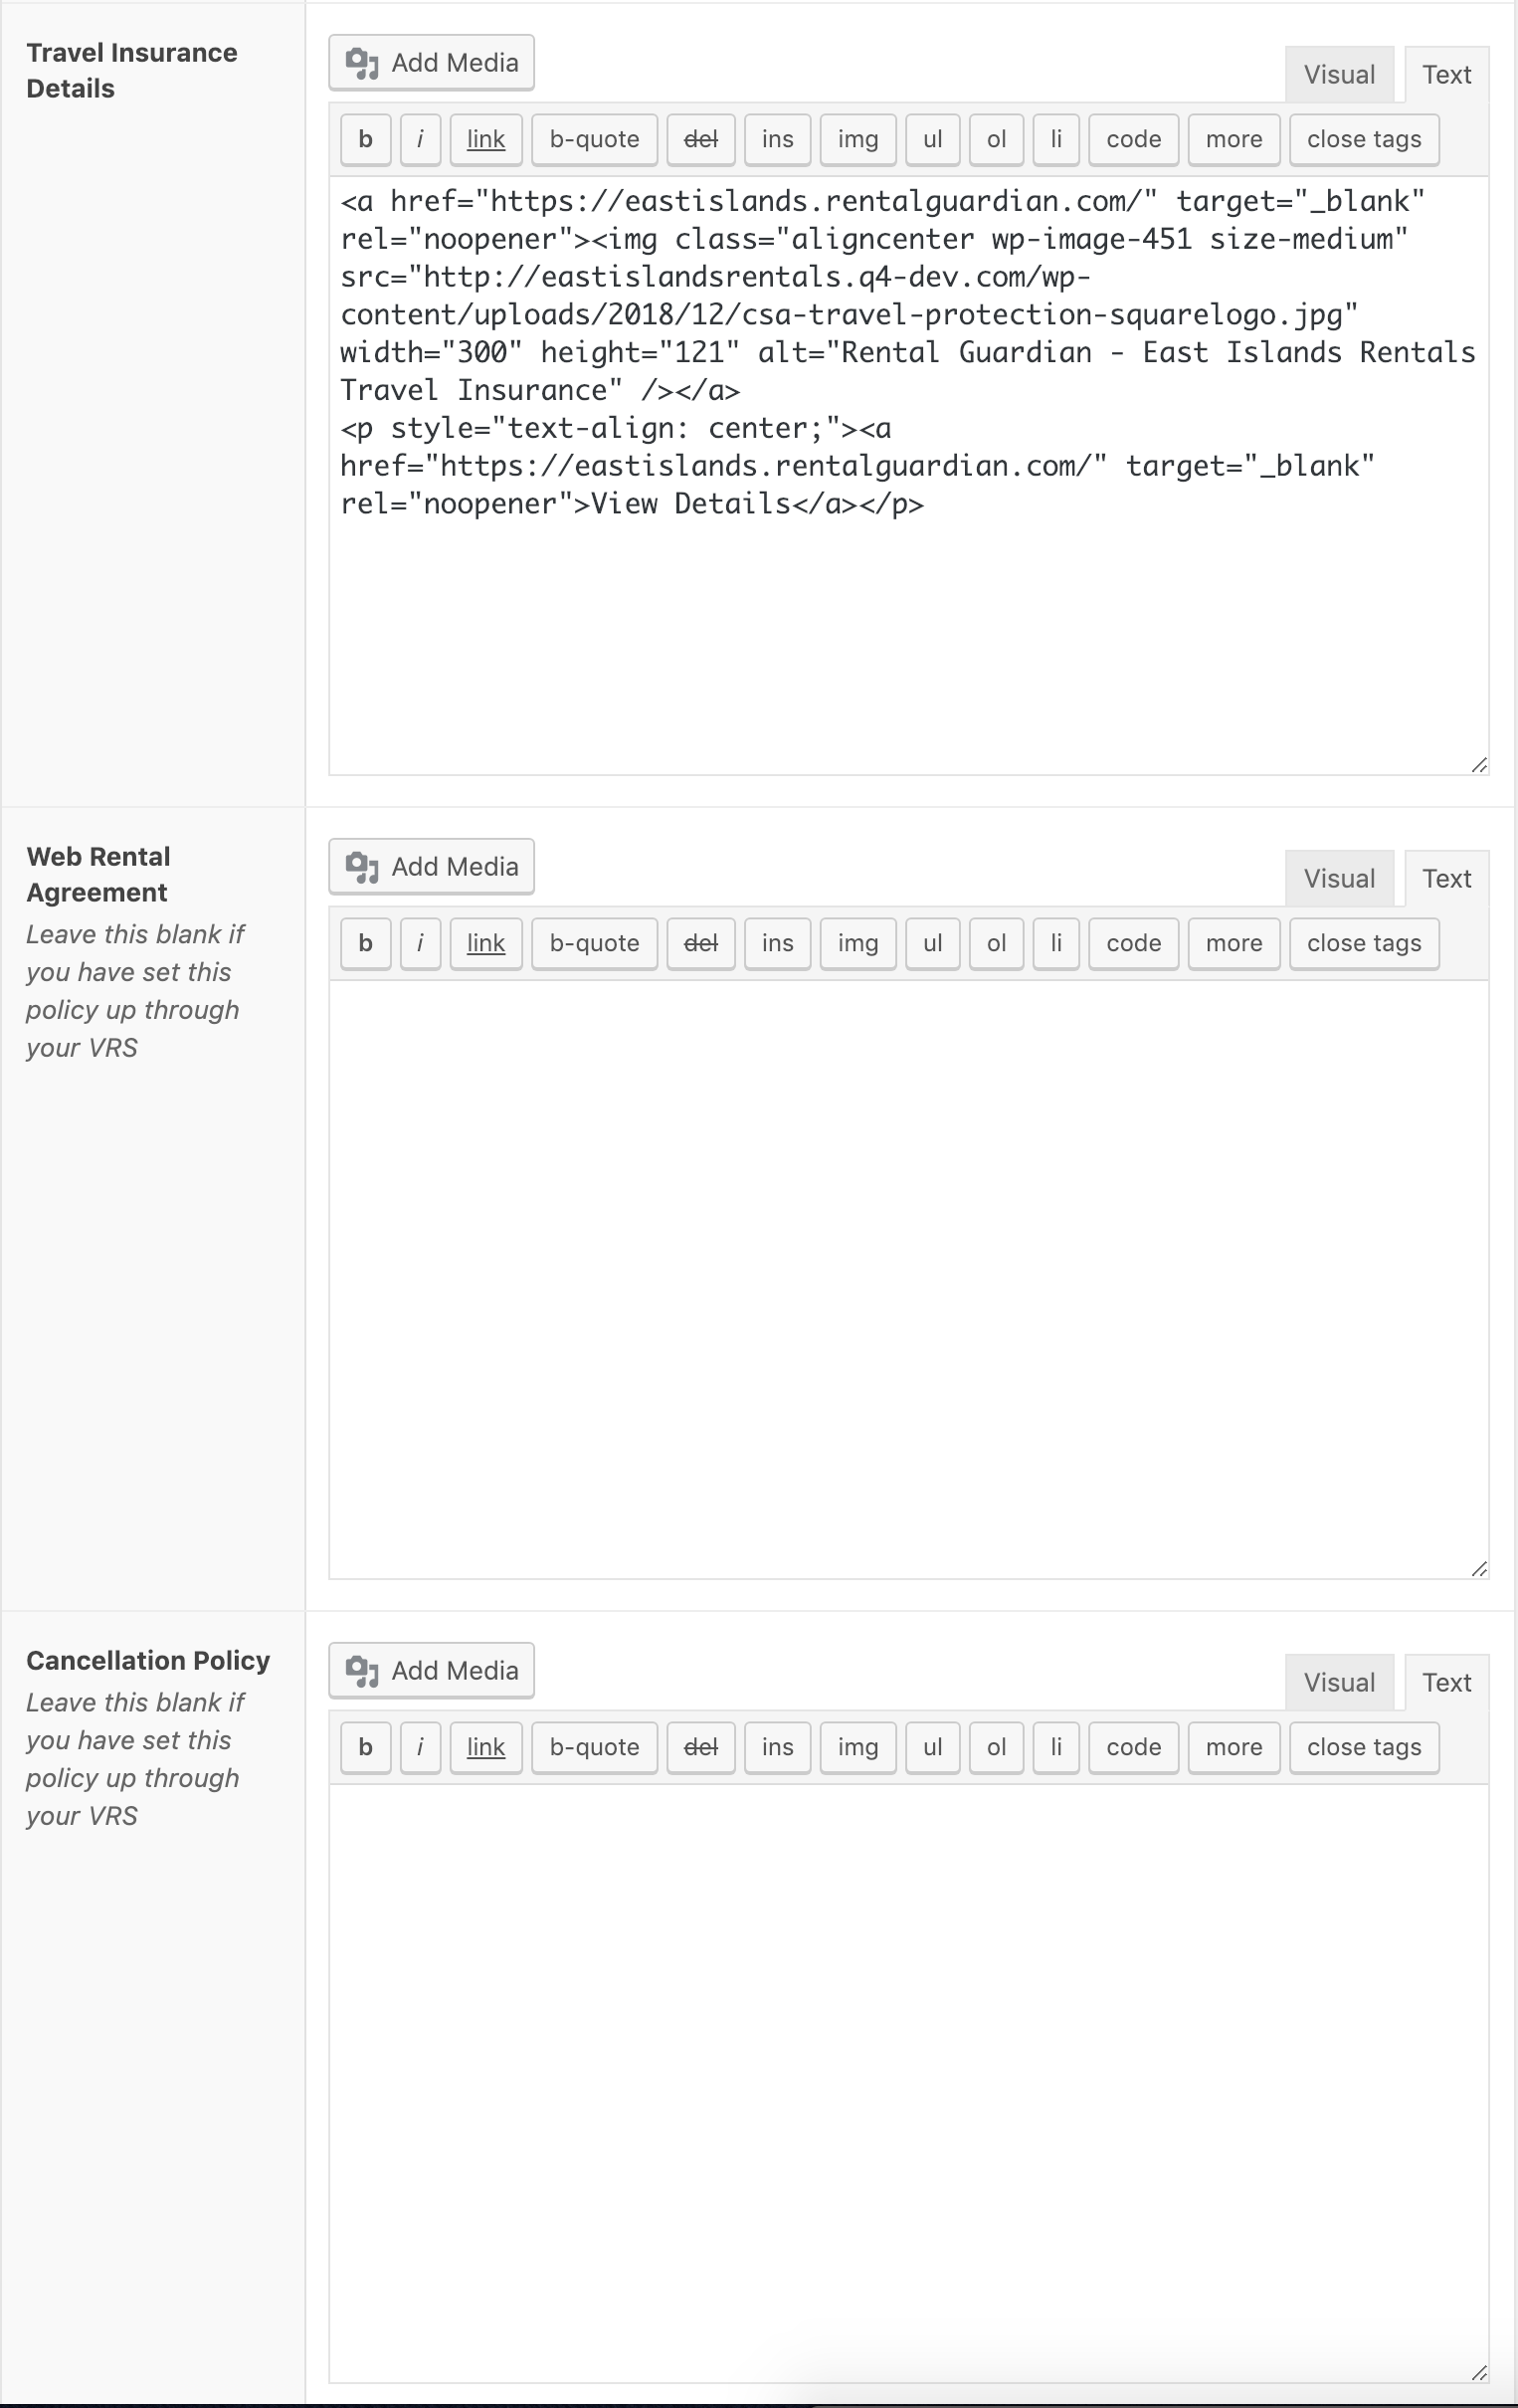
- Travel Insurance Details: This creates the display in the pop-up when a user clicks on Travel Insurance details. You need to have the link to the Insurance Details PDF you want to display and the logo of the insurance company (either a link to the travel insurance website or a PDF added to your site media). For example (use your own links):
<a href="http://paramountdestinations.q4-host.com/wp-content/uploads/2018/05/red-sky-travel-insurance.pdf" target="_blank" rel="noopener">
  <img class="aligncenter size-medium wp-image-267" src="https://paramountdestinations.q4-host.com/wp-content/uploads/2018/05/redsky_logo_wtag-150x150.jpg" alt="red_sky_insurance_logo" width="150" height="150" />
</a>
<p style="text-align: center;">
  <a href="http://trippreserver.com/sun-trip.html" target="_blank" rel="noopener">View Details</a>
</p>
- Web Rental Agreement: For Escapia Customers, do not enter anything in this field. Your Web Rental Agreement is pulled in through the API. For all other PMS’s, the text in this field will populate the Terms & Conditions Box on your booking page.
- Cancellation Policy: For Escapia Customers, do not enter anything in this field. Your Cancellation Policy is pulled in through the API. For all other PMS’s, the text in this field will populate the pop-up when a user clicks the “Cancellation Policy” link on your booking page.
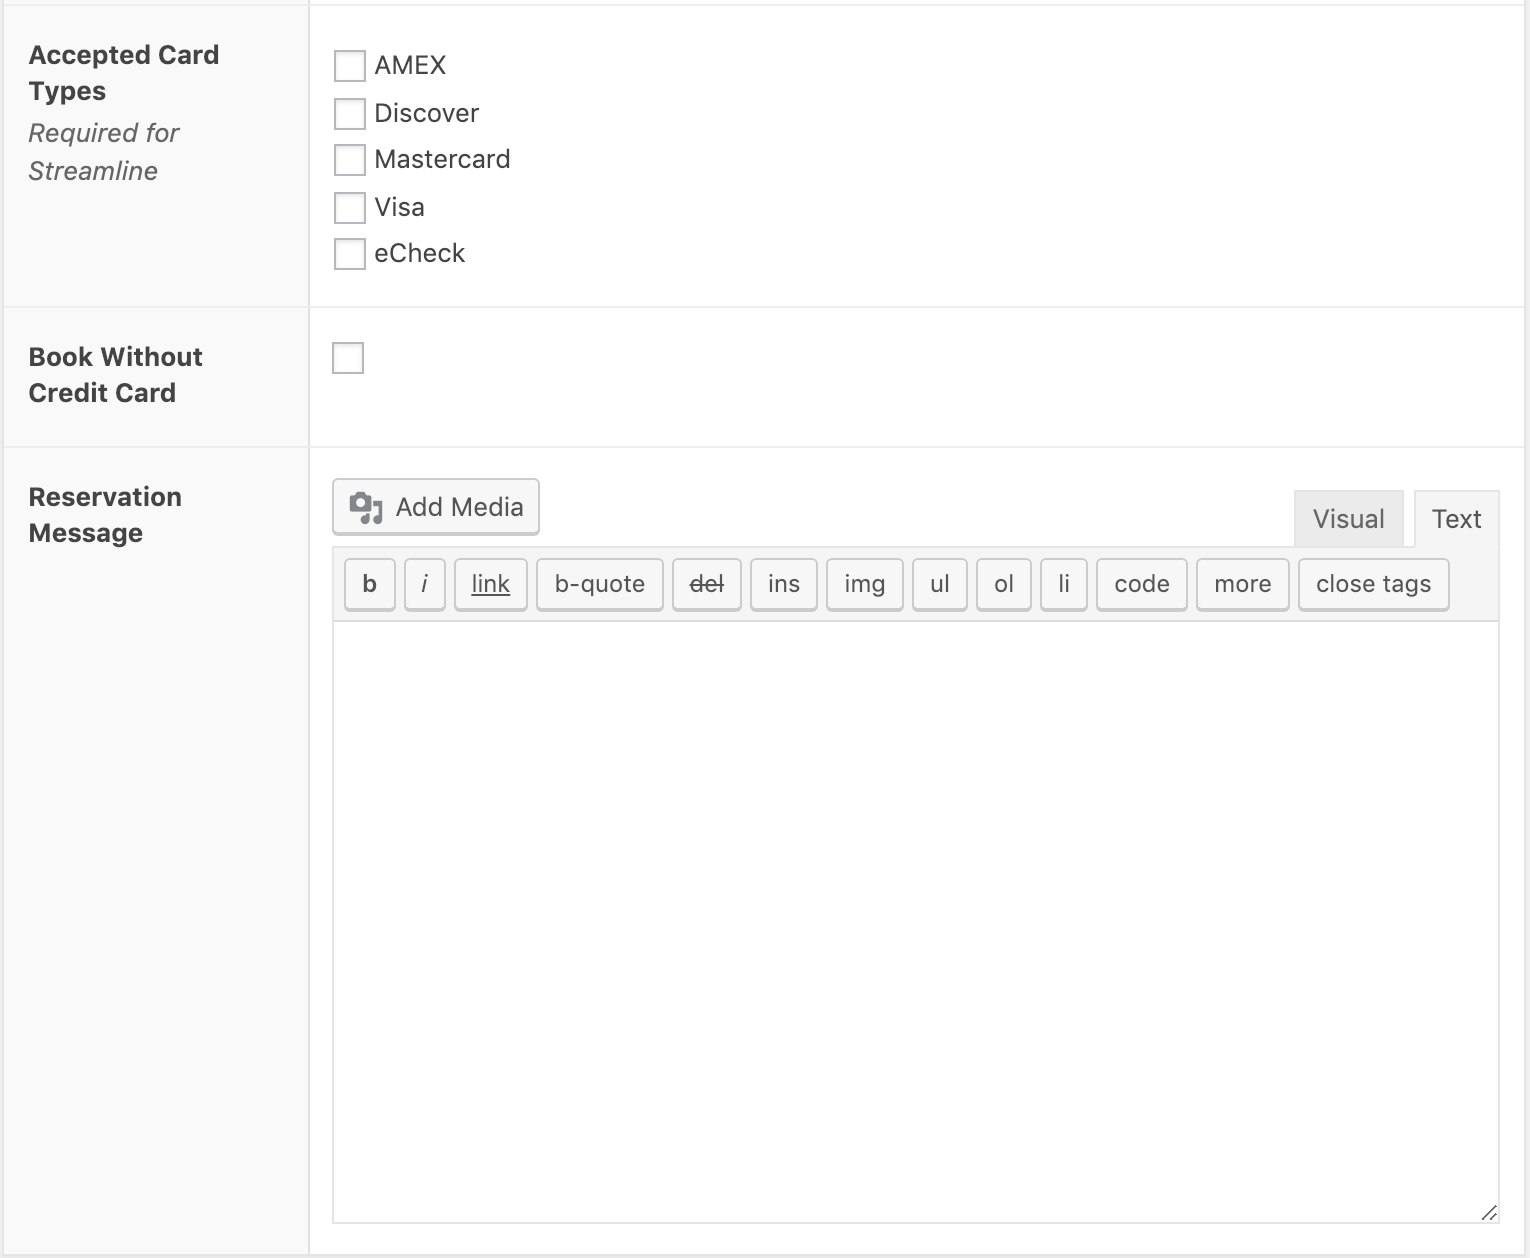
- Accepted Card Types: Right now, this is only required for Streamline Customers because their API doesn’t return the accepted card types for just 1 customer. You can see what cards are accepted by Streamline customers by going to this site and searching for your customer name: https://web.streamlinevrs.com/dc/b2bf826e55874e592d2501fbd7c0dd8d/companies.xml?username=Homeaway&password=Hom3@way!
- Book without Credit Card: This is currently only used for The Residences website, but if you click this link, your site will not display fields for credit card data. Verify that this is an option with any PMS other than V12.
- Reservation Message: This is custom messaging to display on your reservation page. If you leave this blank, you will still see the default page that includes the property photo and name, confirmation number, and total cost.
Download Property Images
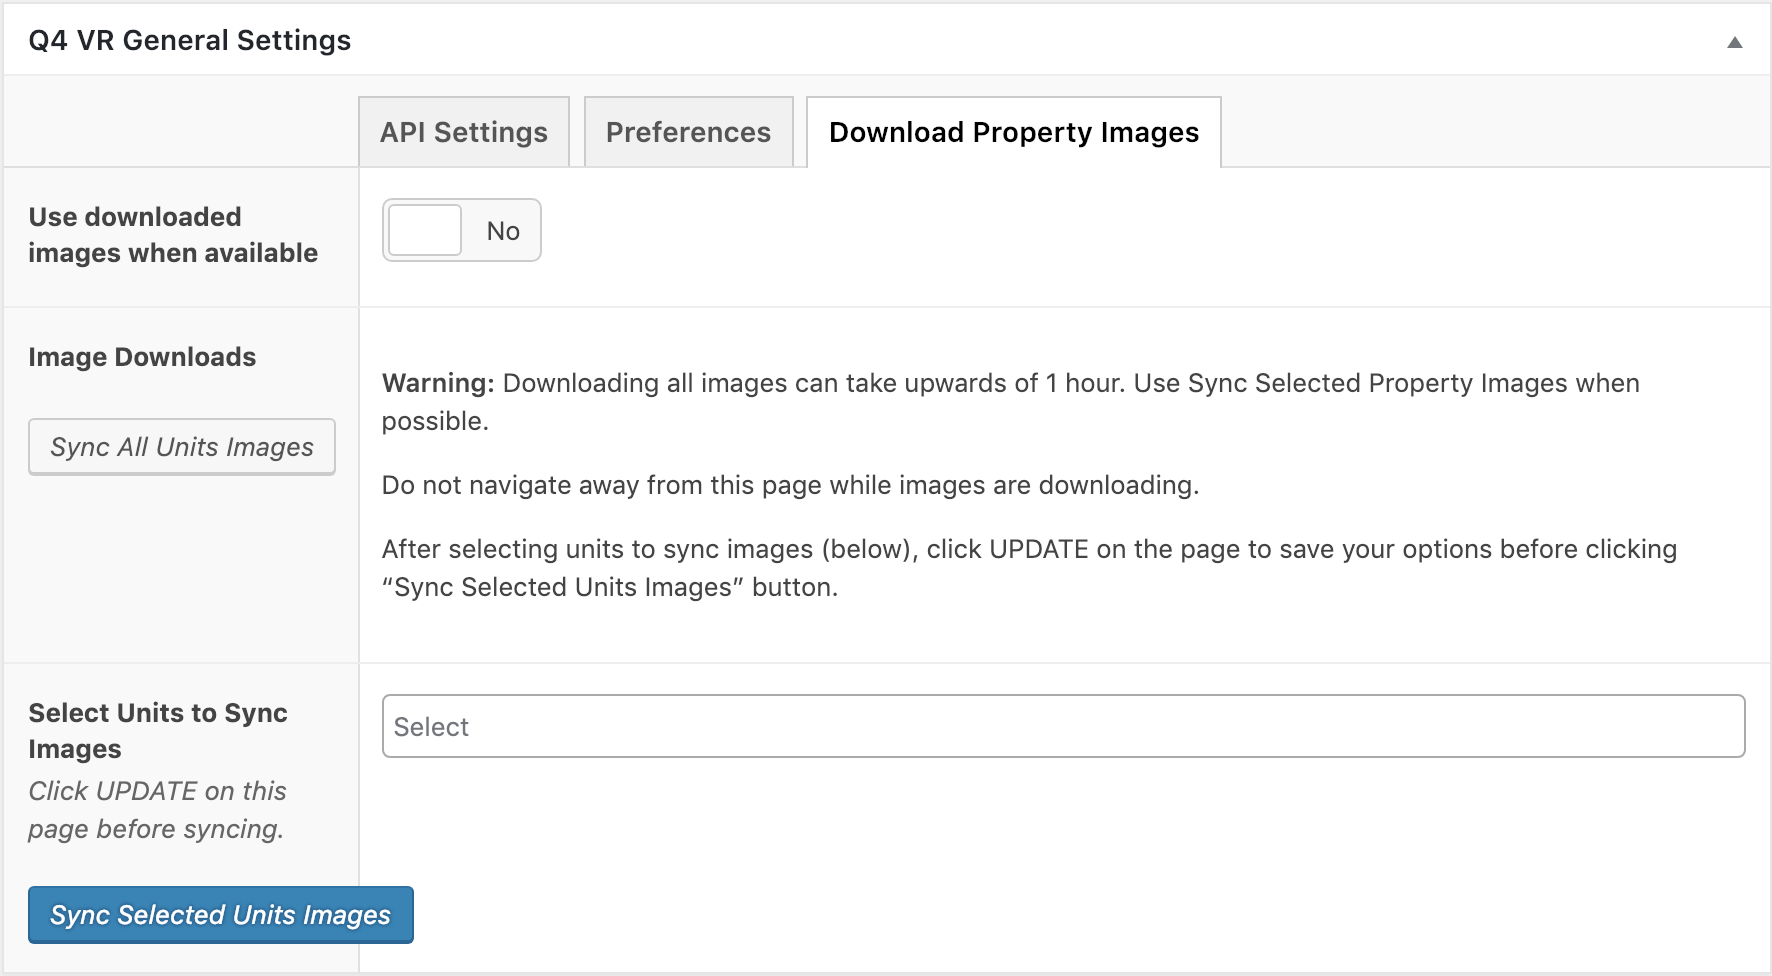
- Use downloaded images when available: Turn on when you want to download all property images to the local database. Use this feature if your customer has gigantic images that are slowing down the site. When this is turned on, your site will automatically refresh the downloads once a day.
*Downloading Images is REQUIRED for all VRM customers - Image Downloads: Click the “Sync All Units Images” button if you want to download ALL of the property images. This can take a LONG TIME, like an hour, and you can’t navigate away from the page until it is finished. Plan accordingly.
- Select Units to Sync Images: You can select properties by name, click “Update”, and then “Sync Selected Units Images” to download the images from the selected properties. Use this if a customer tells you they need to update pictures immediately or if you just synced a new unit.
- KB Article: https://kb.q4launch.com/q4vr-download-and-compress-property-images/
Custom Messaging
The Q4 Custom Messages section has 3 tabs – 1 for each page type created for VR customers that allows for customization. You will see that some fields are required (red star). These fields include a default message; you can edit this message, but do not leave this field blank. For non-required fields, the custom message is build into the HTML of the page and it is only changed if a message is present in these fields. Each custom message option is described below.
Search Page
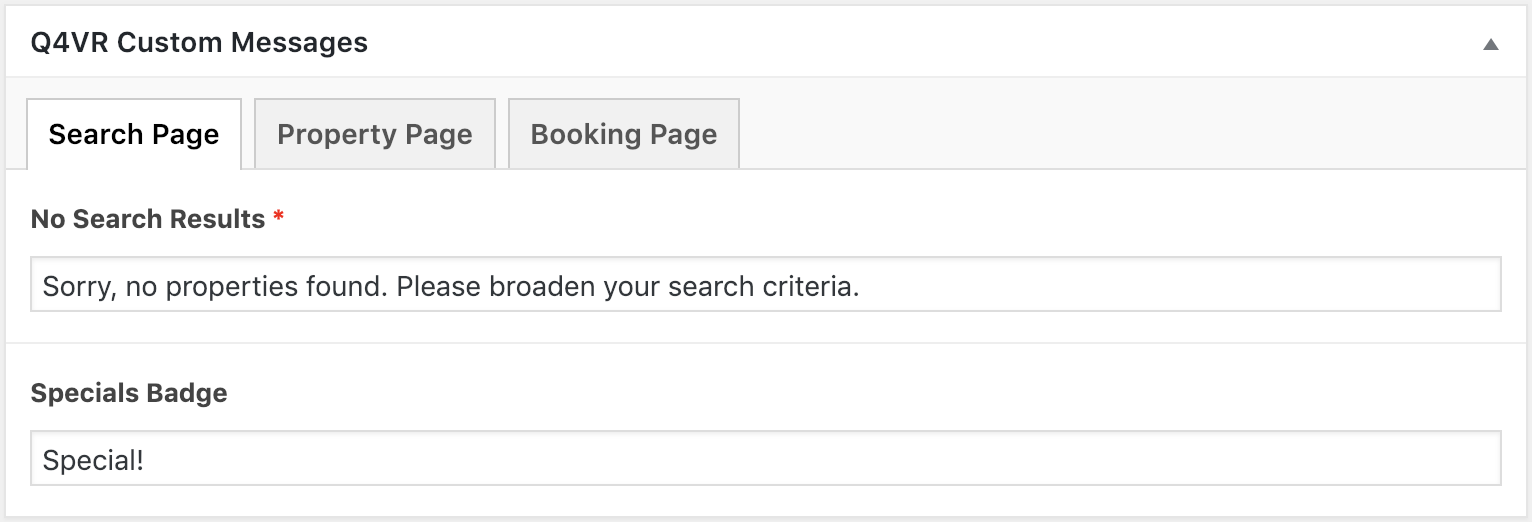
- No Search Results: This is the message that is returned when a user performs a search that returns no results.
- Specials Badge: This is the word that appears on properties marked as specials on the search results.
Property Page
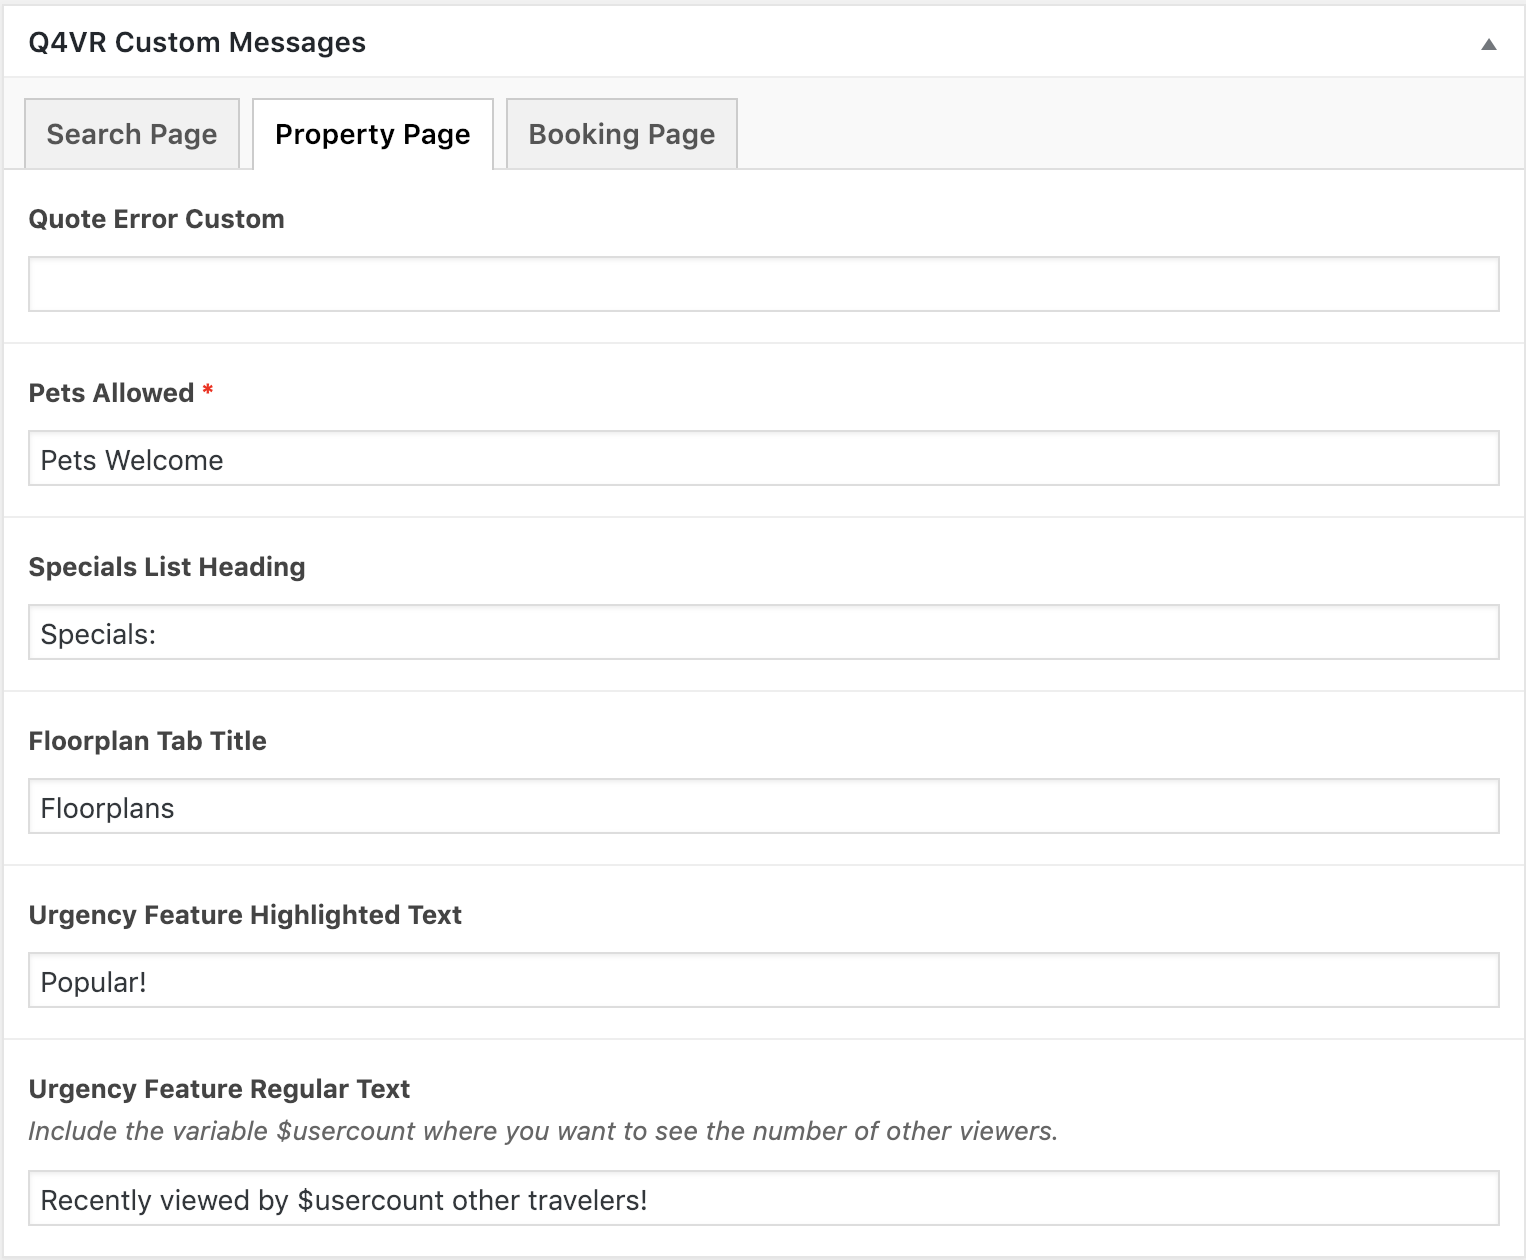
- Quote Error Custom: This is the error message that displays under the “Get a Quote” form when the user makes a request that results in an error. The API derived error message will still appear, but this is an optional additional message you can add after the API error. A good option could be a phone number or email the user can use to contact the customer in the event of an error. Ex. “Questions? Call us at 123-456-7890.”
- Pets Allowed: This is the text that is displayed on units that allow pets next to the dog paw icon. The default is “Pets Welcome”, but some owners only allow dogs and prefer a more specific “Dogs Welcome”.
- Specials List Heading: This is the word on the property page above the list of specials if specials are associated with that property.
- Floorplan Tab Title: This is the wording on the tab that displays the Truplace or Matterport floorplan.
- Urgency Feature Highlighted Text: This is the highlighted word on the urgency feature to bring attention to the recent visitor count. The default is “Popular!”.
- Urgency Feature Regular Text: This is the text that shows the number of recent visitors. When you update this text, be sure to use the variable “$usercount” where you want to show the number of visitors.
Booking Page
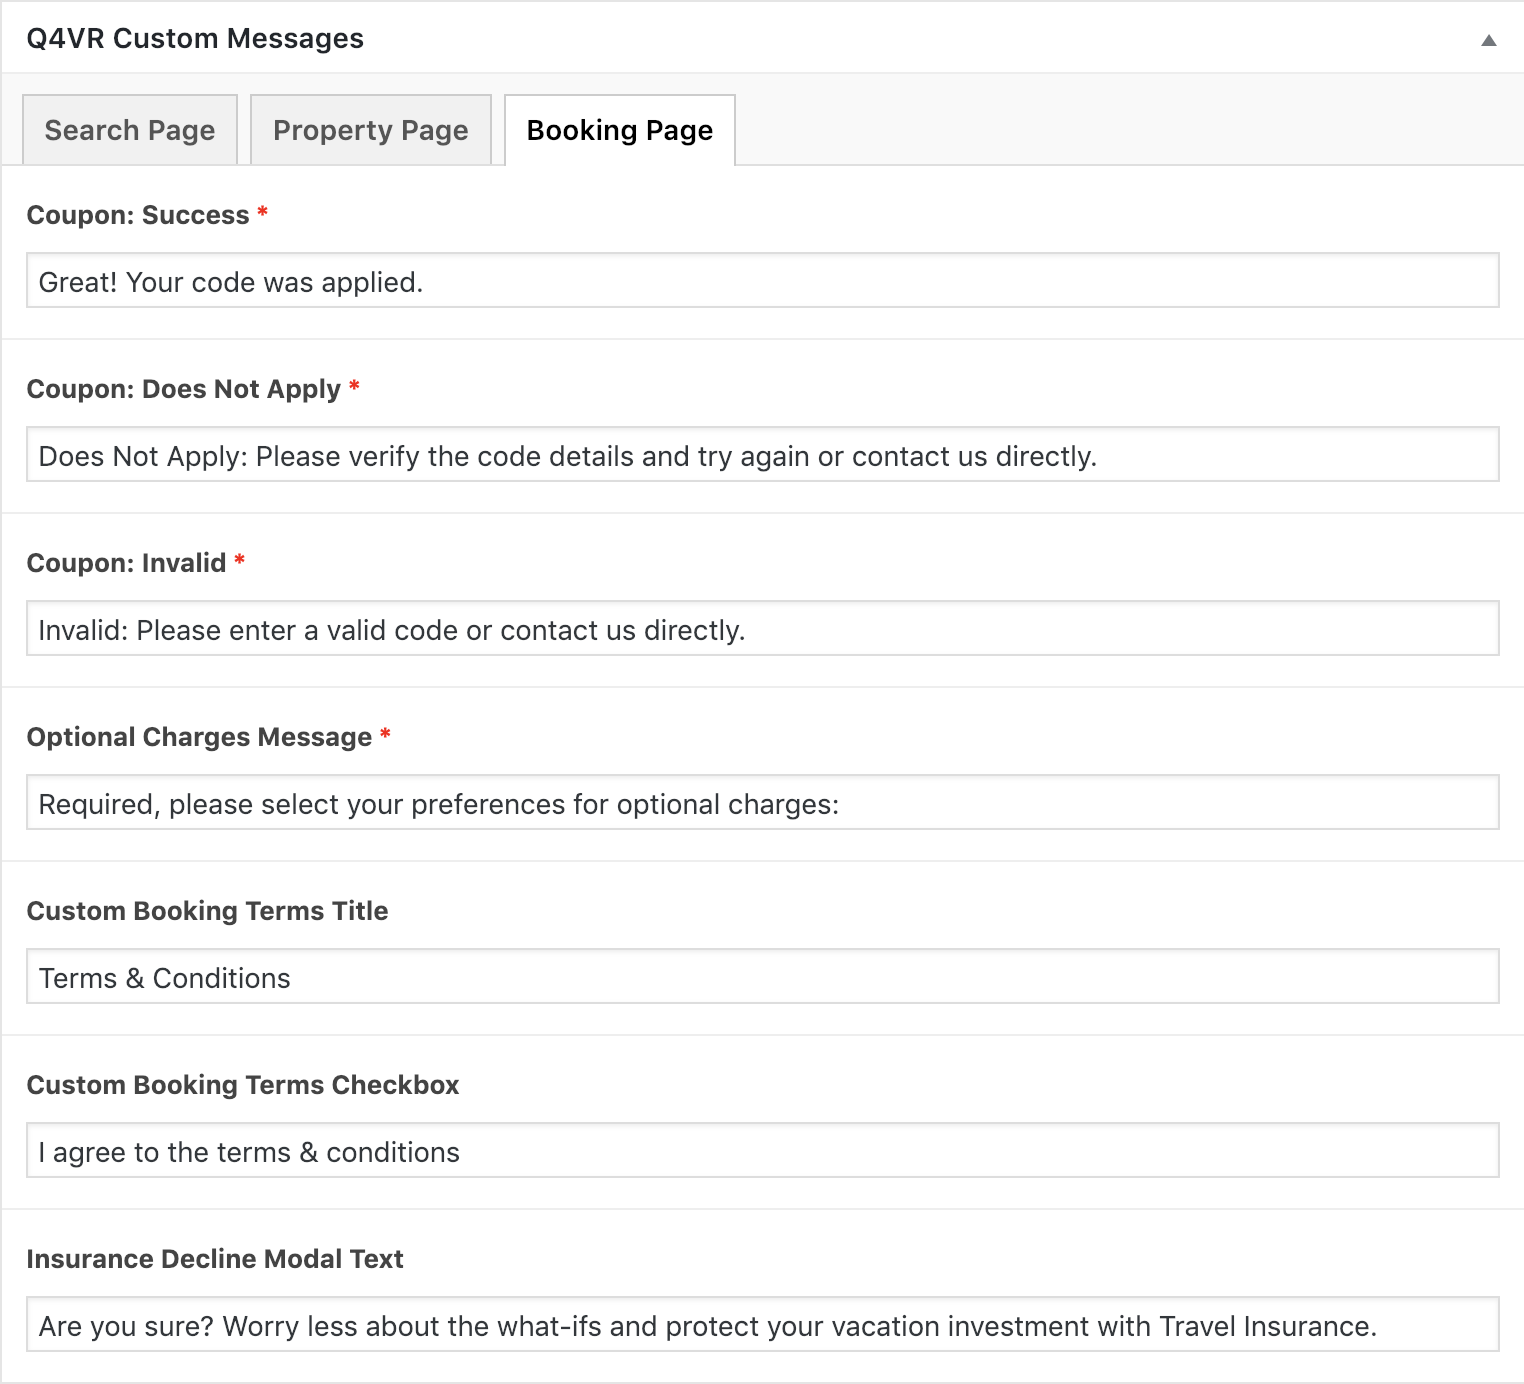
- Coupon: Success: The message displayed when a coupon code is successfully applied to the booking.
- Coupon: Does Not Apply: The message displayed when a coupon code does not apply to the property or stay criteria for the booking. This only comes back for Escapia customers. Ex. A user puts in a coupon that gives you 1 night free for a 5 night stay, but the quote they requested is only a 3 night stay.
- Coupon: Invalid: The message displayed when a coupon code is invalid and not applied to the booking.
- Optional Charges Message: This message appears over the Optional Charges the user can select (usually insurance). Here you can specify that if a guest decides to decline Travel Insurance, they are liable for all cancellation costs or whatever you want. If the customer does not have ANY Optional Charges, you can leave a blank space ” ” in this field so no message is displayed.
- Custom Booking Terms Title: You can customize the H2 title above the Terms and Conditions box on the booking page.
- Custom Booking Terms Checkbox: You can customize the text next to the checkbox a guest must click before submitting their booking.
- Insurance Decline Modal Text: Customize the text inside the Insurance Pop-up that can be activated to display when a guest clicks “No” for Travel Insurance.
Search Form Settings
There are 4 tabs in the Search Form Settings box: Basic Search, Advanced Search, Choose Amenities, and Search Options.
Basic Search + Advanced Search
The set up is the same for search fields in either of these tabs. If you place your search field in Advanced Search, it will only be visible when a user clicks on the Advanced Search button.
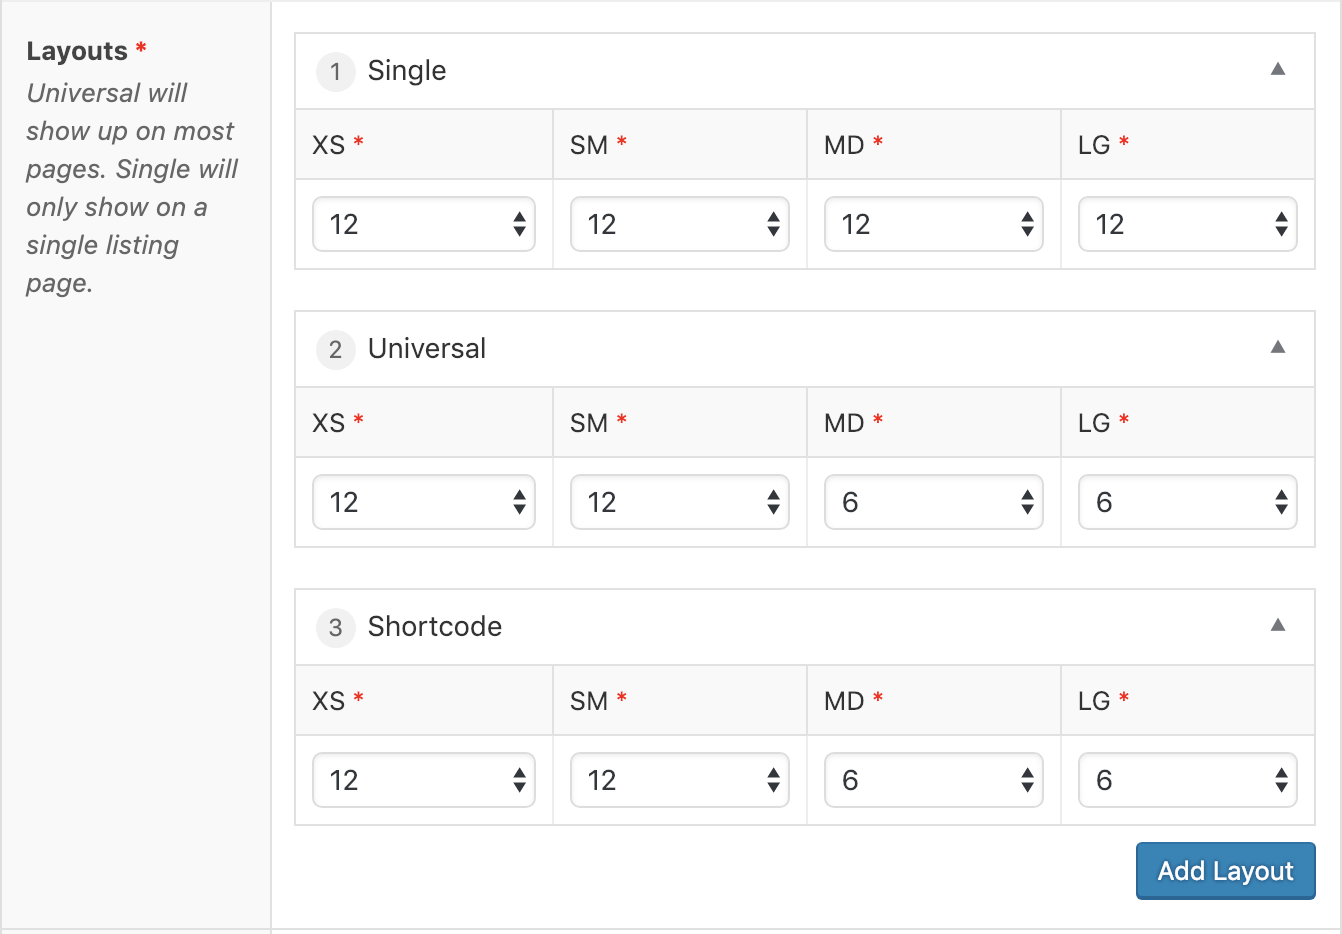
- LAYOUTS
Each Search Field requires you to set up layouts. This is where and how the search form will display on the page.
To add a layout:
-
- Click the blue Add Layout button.
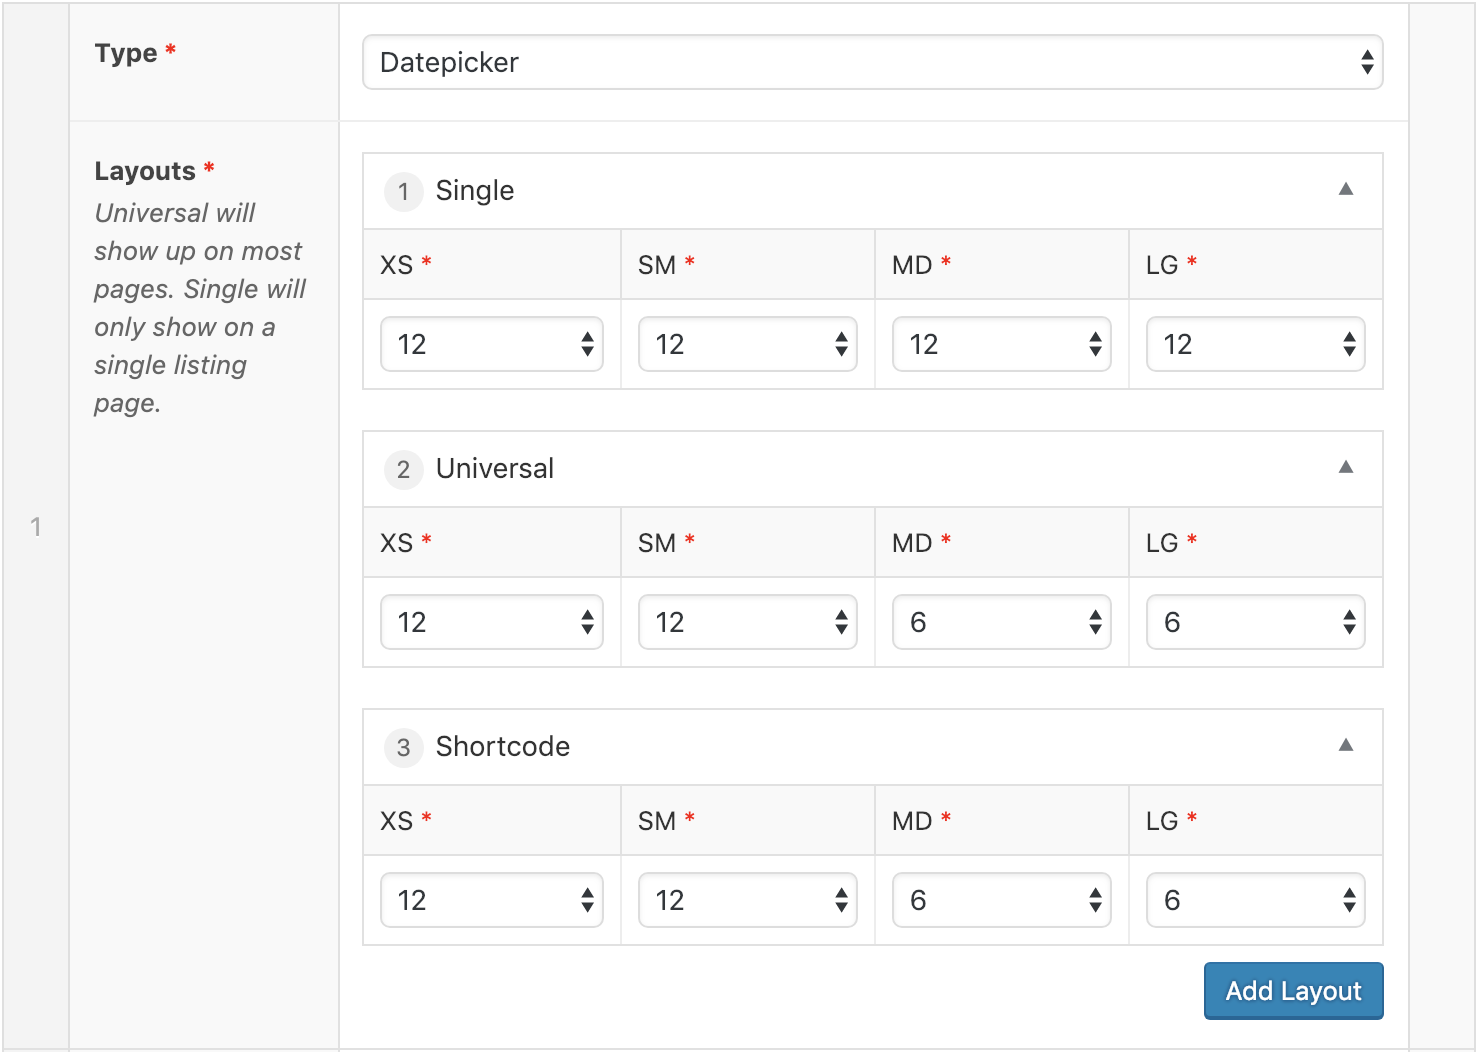
- For each layout option (Universal, Shortcode and Single), set the column width (1-12) for each screen size (XS, SM, MD, LG). Reference Summary of Bootstrap Grid System below to understand what these settings control.
-
- Single: You will only include a Single layout with DatePicker, Counter, and Submit Button fields. – This layout controls the search bar found on the individual property page when a guest wants to get an instant quote.
- Universal: This is applicable to all of the search bars. You will set this up for every field.
- Shortcode: Be sure to set up in the Basic Search options and Advanced Search options.
-
- Click Update to save changes.
Device Screen Sizes (XS, SM, MD, LG)
Bootstrap is built to allow for responsive web designs. In order to create a responsive design, Bootstrap allows users/developers to control the layout for a range of screen sizes listed below.
XS – Represents Exra Small device screens. Ex: Mobile Phone screen sizes.
SM – Represents Small device screens. EX: Tablet (ie iPad) screen sizes.
MD – Represents Medium device screens. EX: Laptop screen sizes.
LG – Represents Large device screens. EX: Desktop Monitor screen sizes.
Column Settings

Bootstraps layout is divided into 12 separate columns (ie the numbers 1-12 in the dropdown menu). In relation to the screen sizes listed above, Bootstrap allows users/developers to control the width of each element by setting the number (1-12) of columns an element spans.
For example: if you want an element to span half the width of a container element (in this case the Date Picker in the VR Search Bar) on laptop screens, you will need to set that element to span 6 columns wide for MD screen sizes (6 is half of 12).
Sample Column Settings:
1 = 1 column wide
2 = 2 columns wide
3 = 3 columns wide
4 = 4 columns wide
Learn more about Bootstrap’s Grid System
- INPUT NAME OPTIONS – For several of the Field Types, you will be asked to enter your Input Name. You must enter a query variable that is set up in the plugin. Here are your current options:
guests: Filters for # of guests. Used with a select type field AND in your counter field (counter is only used for the Single Search Form).areas: Use with a select type field.locations: Use with select field.min_bedrooms: Filters by minimum # of bedrooms. Use with select field.max_bedrooms: Filters by maximum # of bedrooms. Use with select field.exact_bedrooms: Filters by the exact # of bedrooms. Use with select or checkbox field. Checkbox will allow users to select multiple numbers to broaden their search, but should only be used in the Advanced Search area for styling purposes.min_bathrooms: Filters by minimum # of bathrooms. Use with select field.property_type: Filters by property type if it is set up in the PMS. Use with select field.filter: Use for any filters you have set up for your property posts (anything set up in the Choose Amenities list). Use Checkbox type field. This is an AND type search, so if you select 2 checkboxes in this field, the property must have both attributes to be returned. You can also use this Input Name multiple times, so if you want to set up 1 Search Field for View and 1 Search field for Amenities, you can.
- SEARCH FIELD TYPE – These are the search fields you should select from to set up your search options.
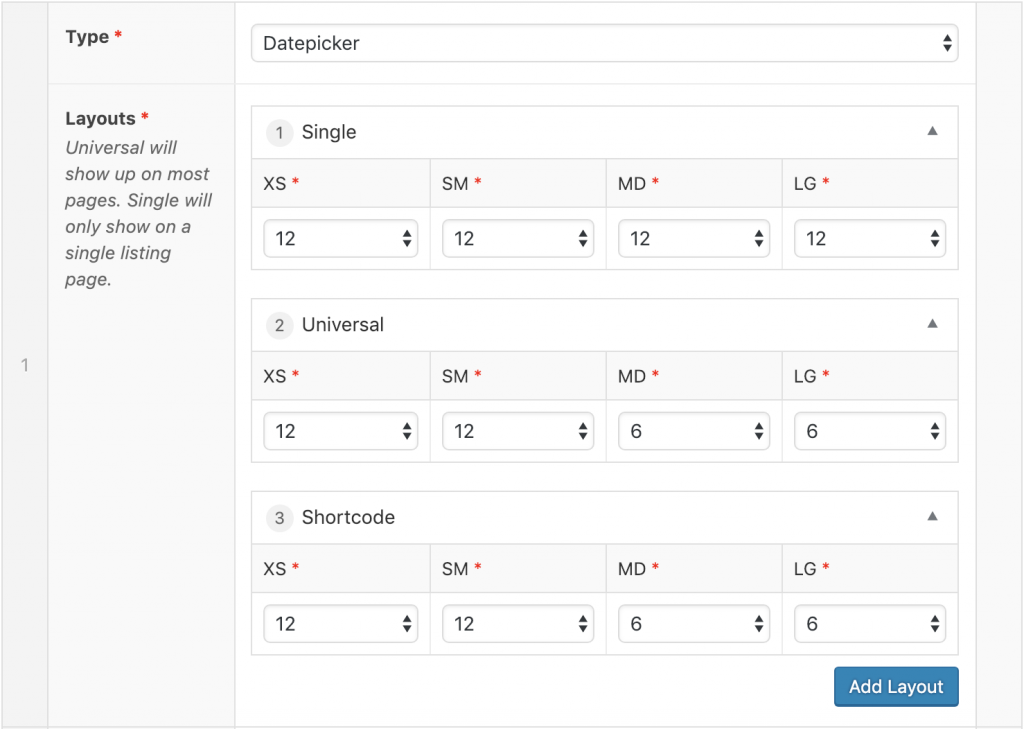
- Datepicker: Set this up in your Basic Search tab with all of the Layouts.
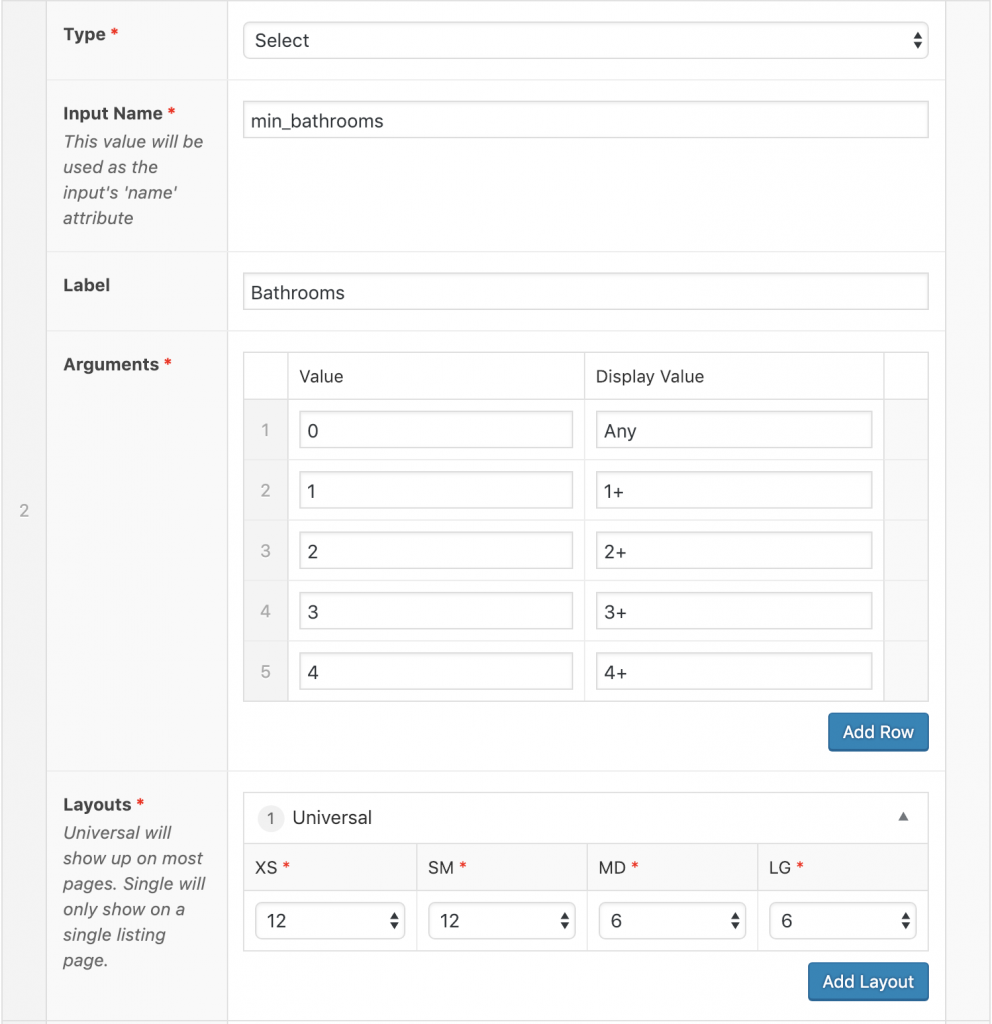
- Select: Set this up with any search criteria where the user should only select 1 option. This works in Basic and Advanced Searches. Don’t use the Single layout.
- Input Name (select from above)
- Label: Label above/next to the field.
- Arguments: Enter the Value and Display Value. The value is the field value expected as a parameter in the API search, and the display value is what is shown to the user. For instance, for min_bedrooms, I would enter the values 0-6 (or whatever the max # of bedrooms your customer has) each on separate lines. For the display value, I would put “Any” for the 0 value, and 1+, 2+, etc. for the display for the other numbers to indicate it is the selected number of rooms and anything more than that. You can also use different value and display value when the value required for an API search is different from what you want to show. Ex. Value for API: “Pool Heat Available ($)” and Display Value: “Heated Pool”.
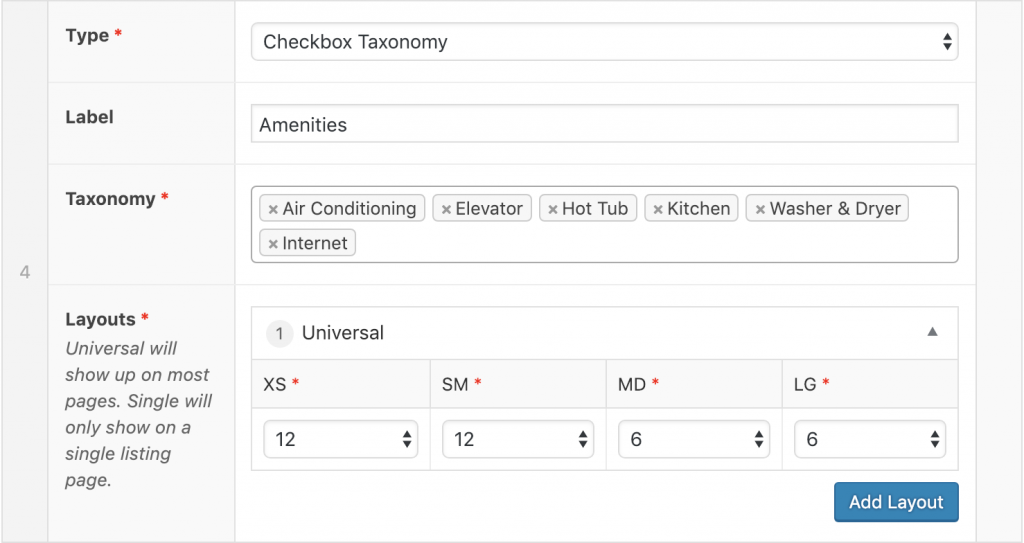
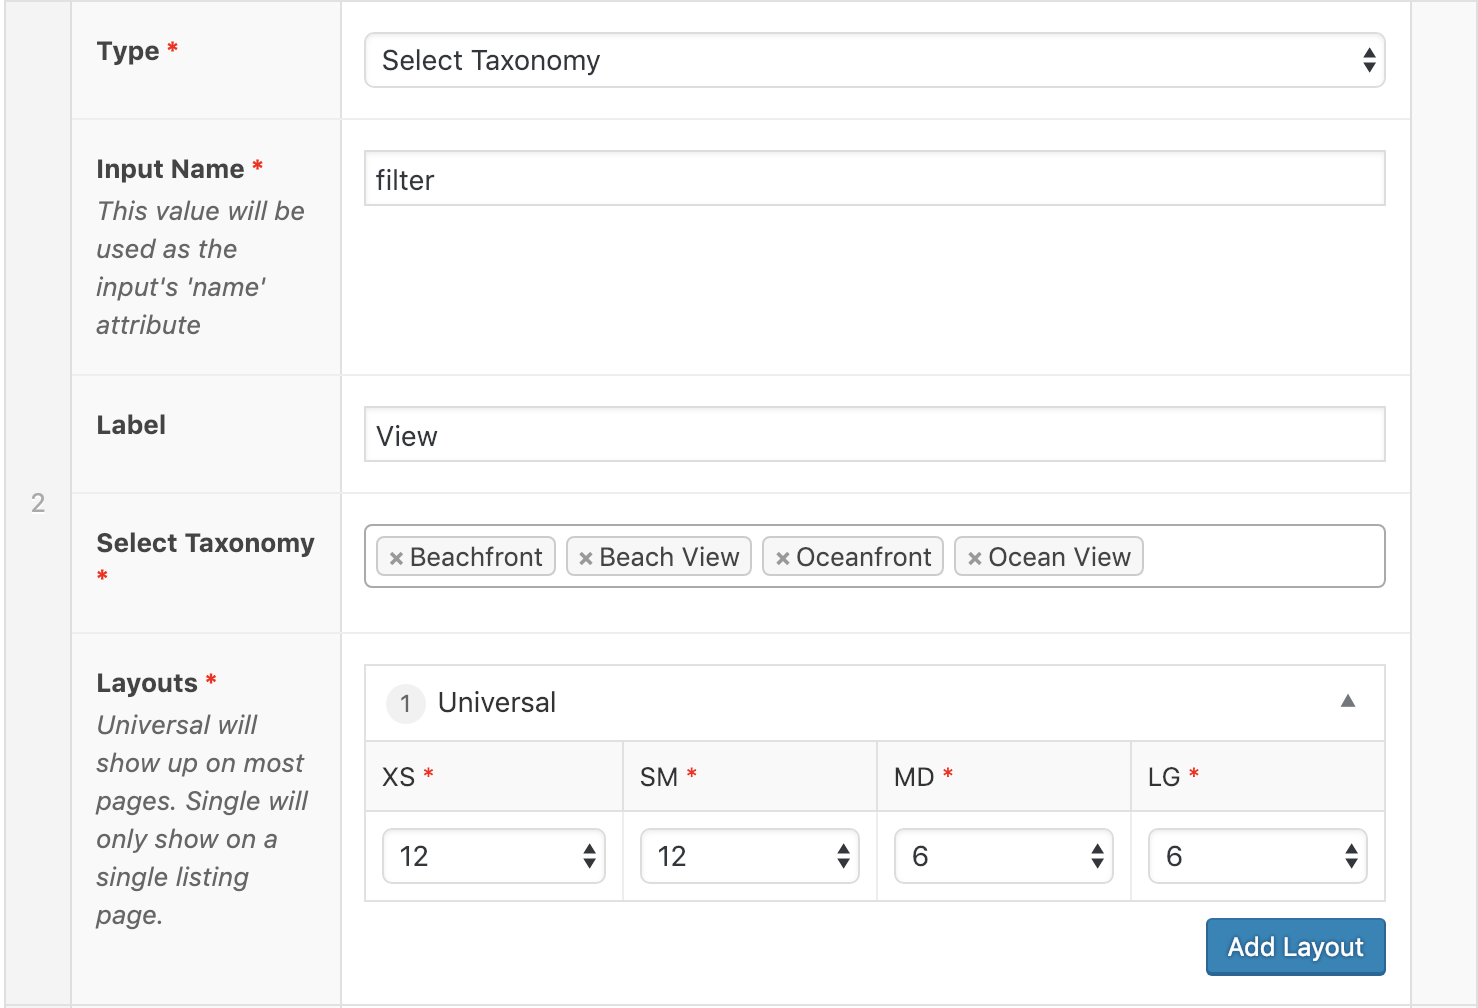
- Select Taxonomy: Use this when you want the user to make 1 selection and you want to populate the search option with your filters. All filters that have at least 1 property in them will populate in the Taxonomy list. You select which ones you want to be selectable in this field.

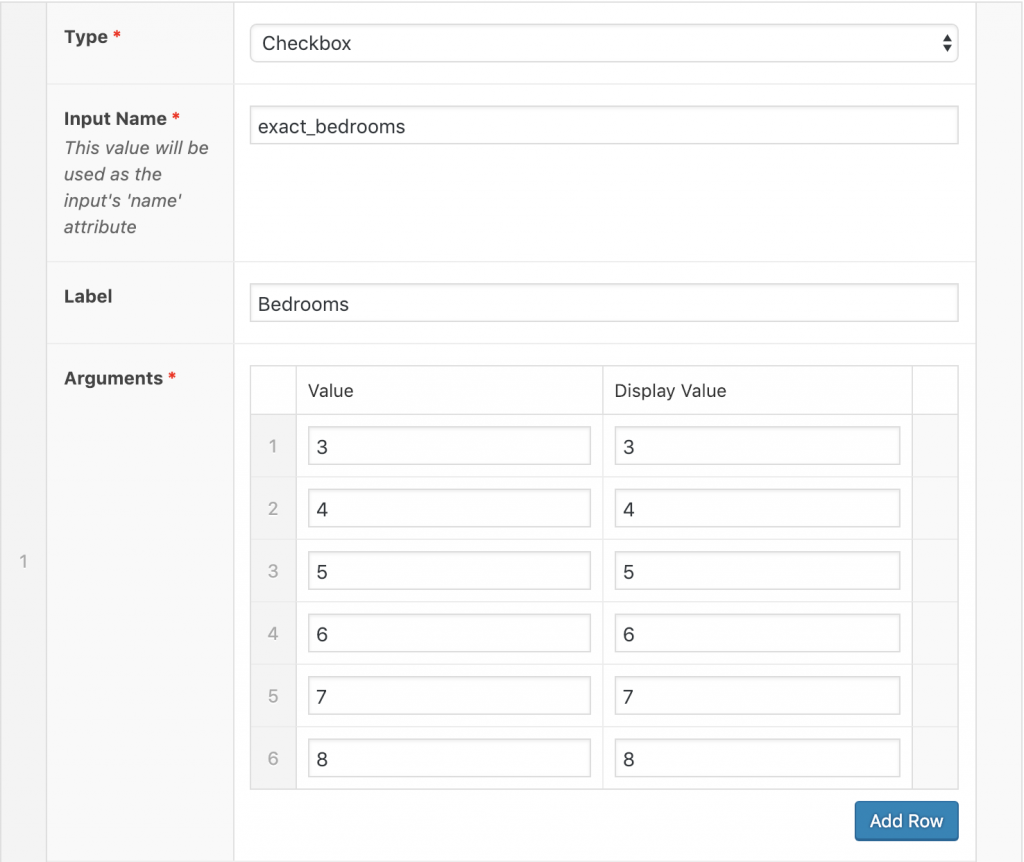
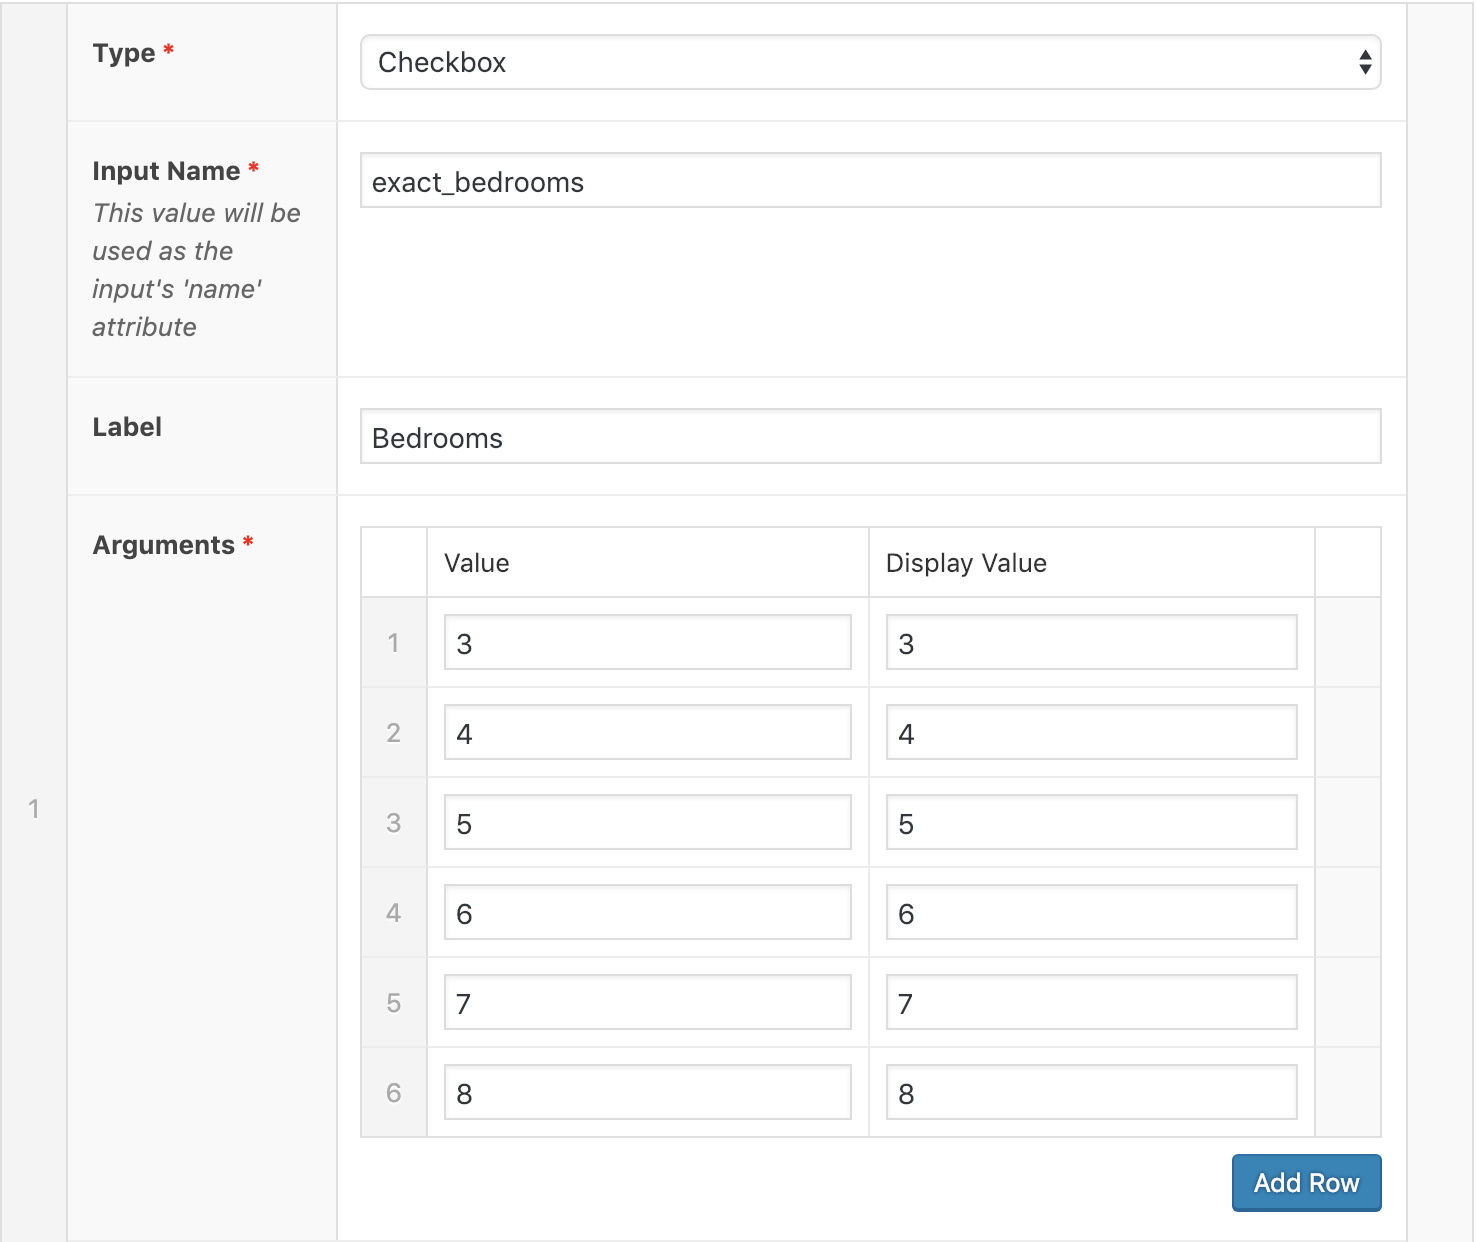
- Checkbox: Set this up with search criteria when the user can select multiple options. Keep in mind that some items are ADDITIVE, so allowing a checkbox could eliminate all search results.
- Input Name (select from above)
- Label: Label above/next to the field.
- Arguments: Like the Select field, enter the Value and Display Value. The value is the field value expected as a parameter in the API search, and the display value is what is shown to the user.
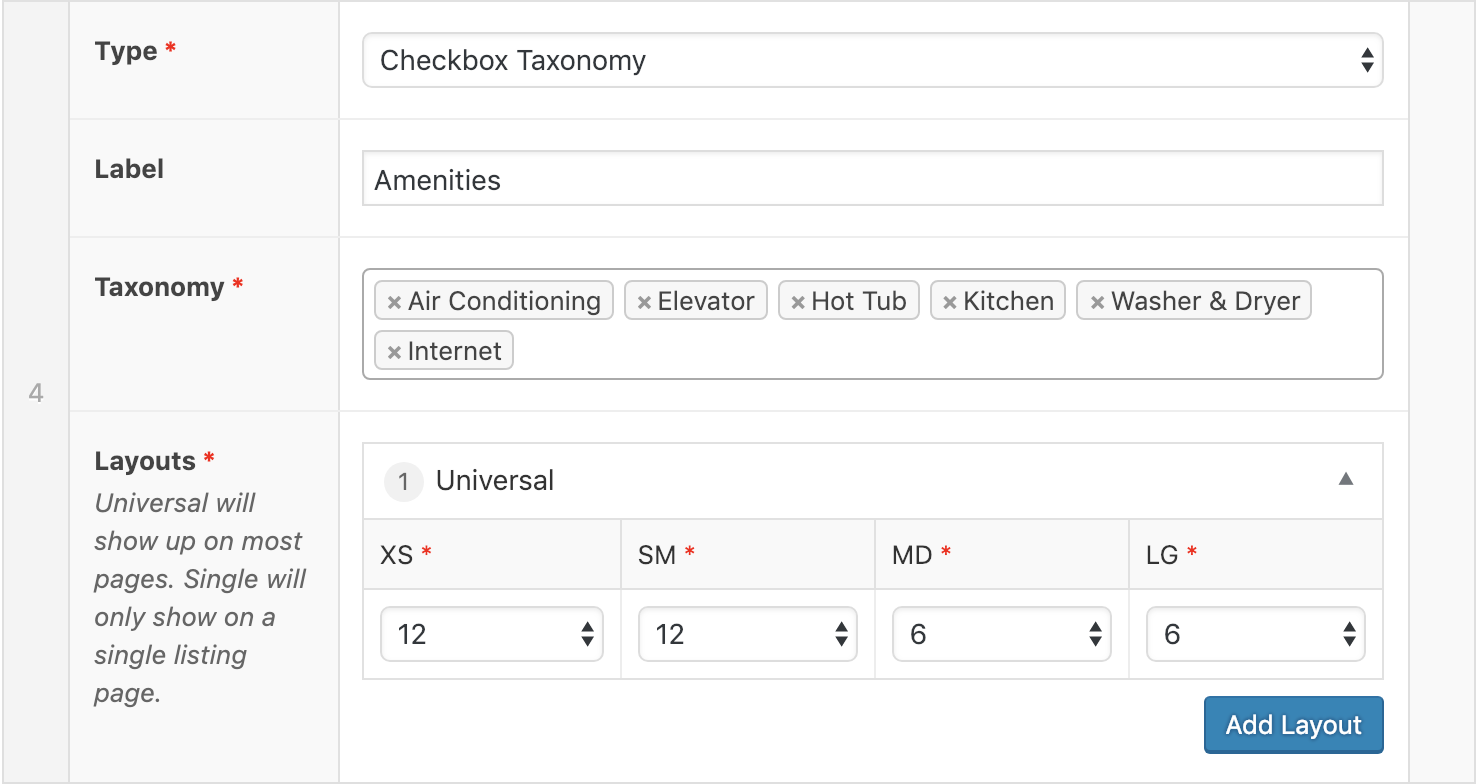
- Checkbox Taxonomy: Use this when you want the user to be able to make multiple selections and you want to populate the search option with your filters. This works well for Amenities.
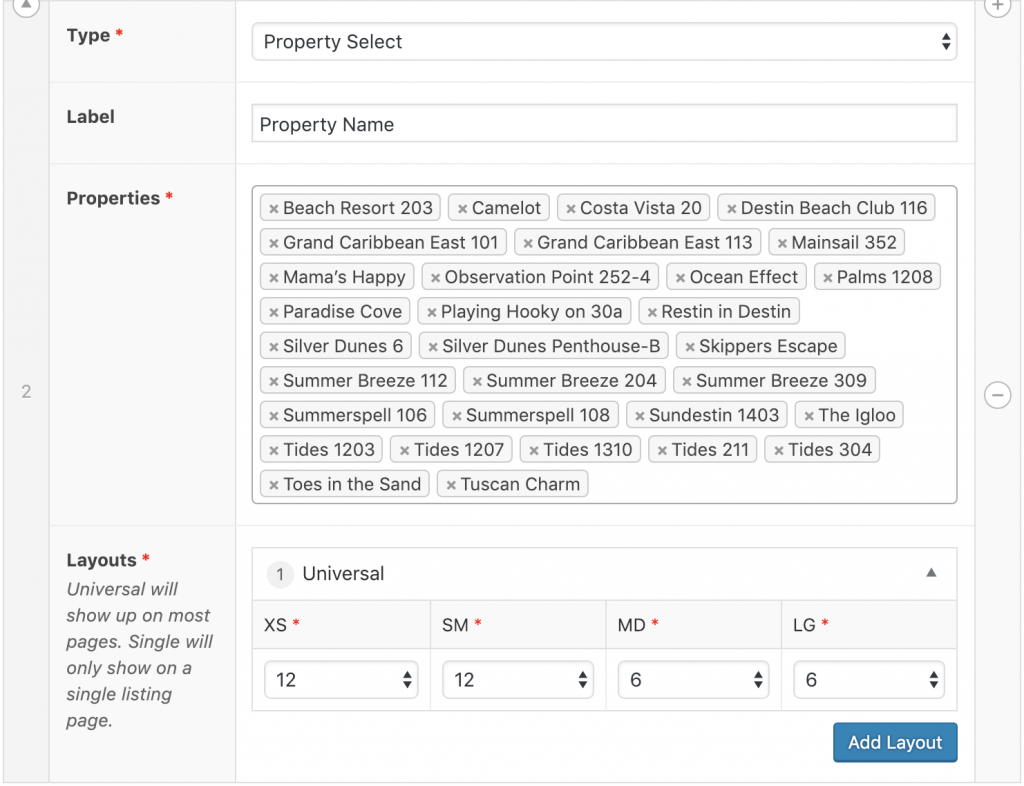
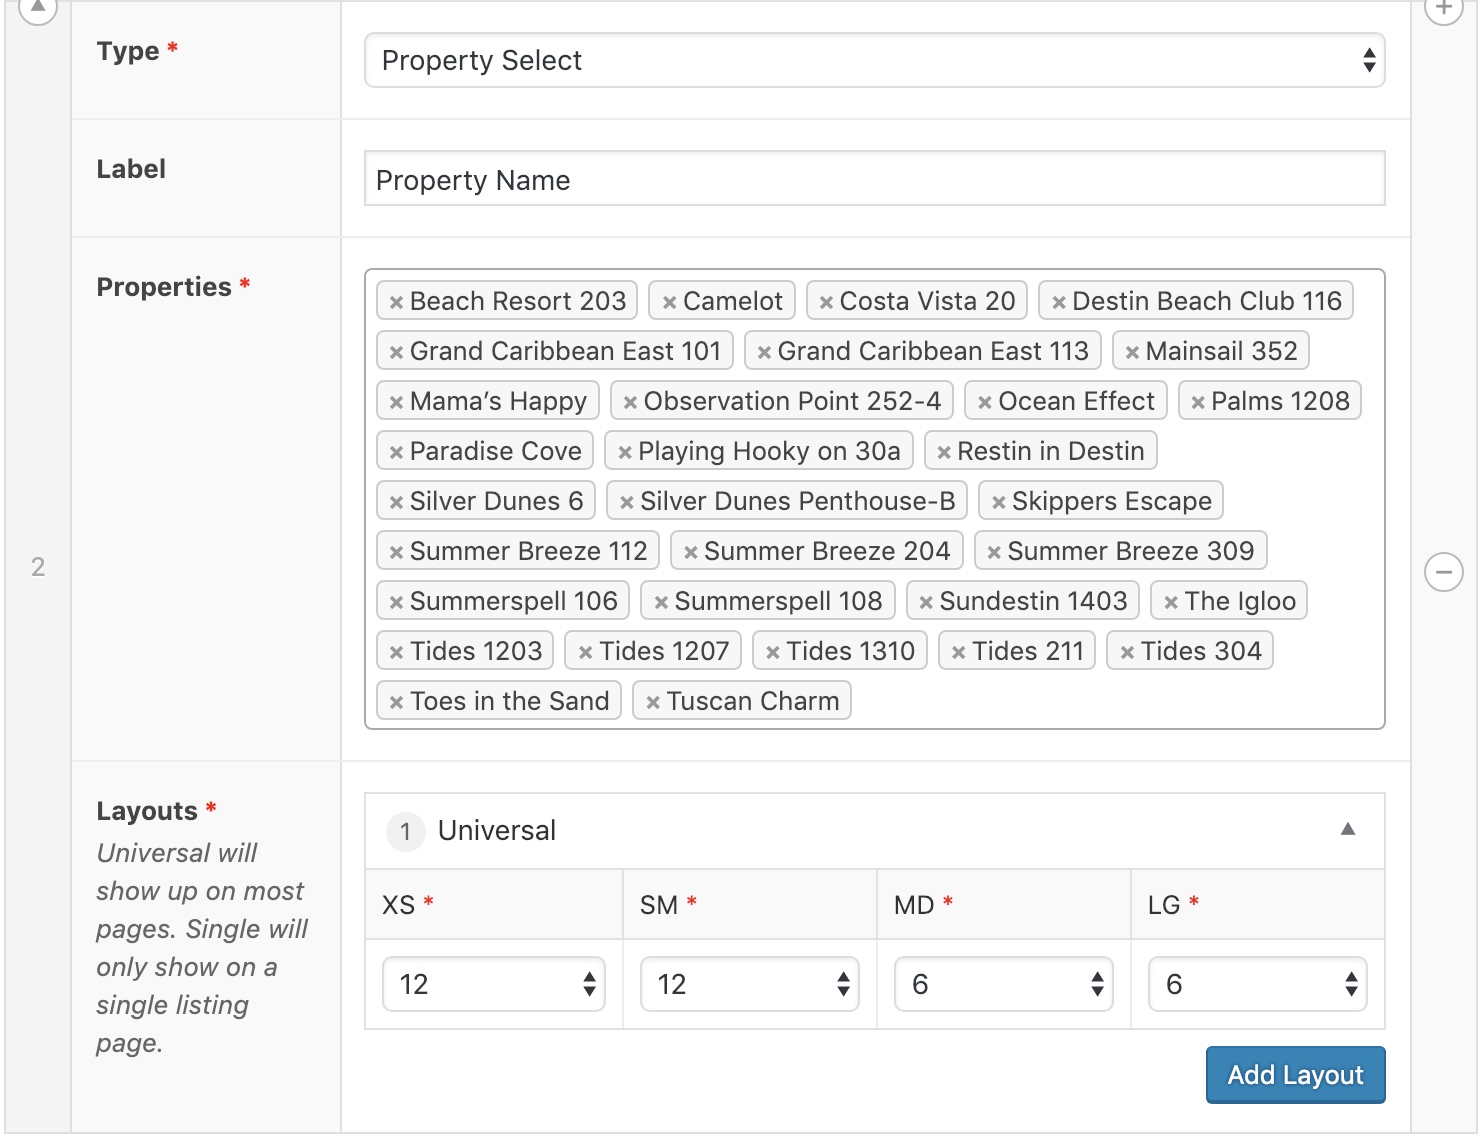
- Property Select: This will automatically populate with all of the property names. Add a Label to display above the field.
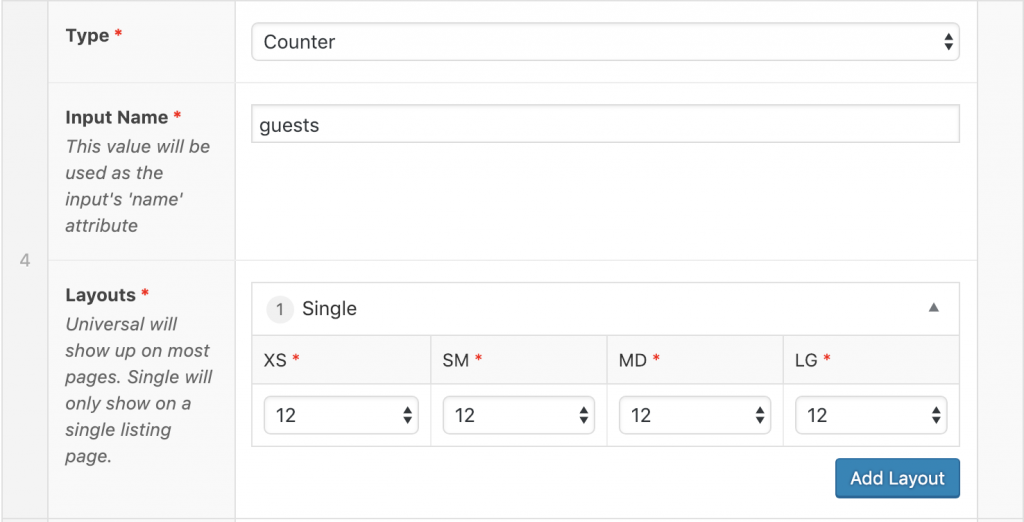
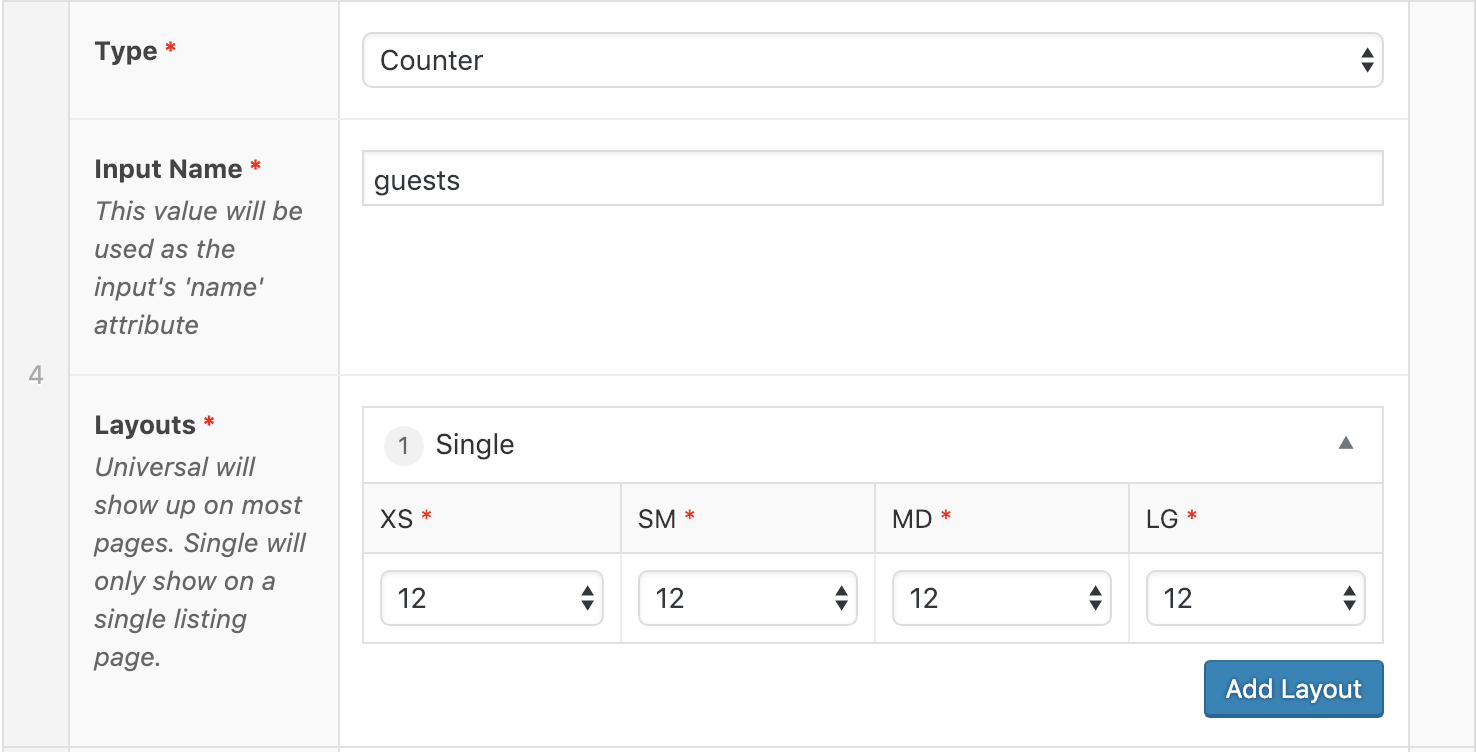
- Counter: Required for the Single Search Form on the property page. Set the input name to “guests”, and set up a Single layout with all 12s.
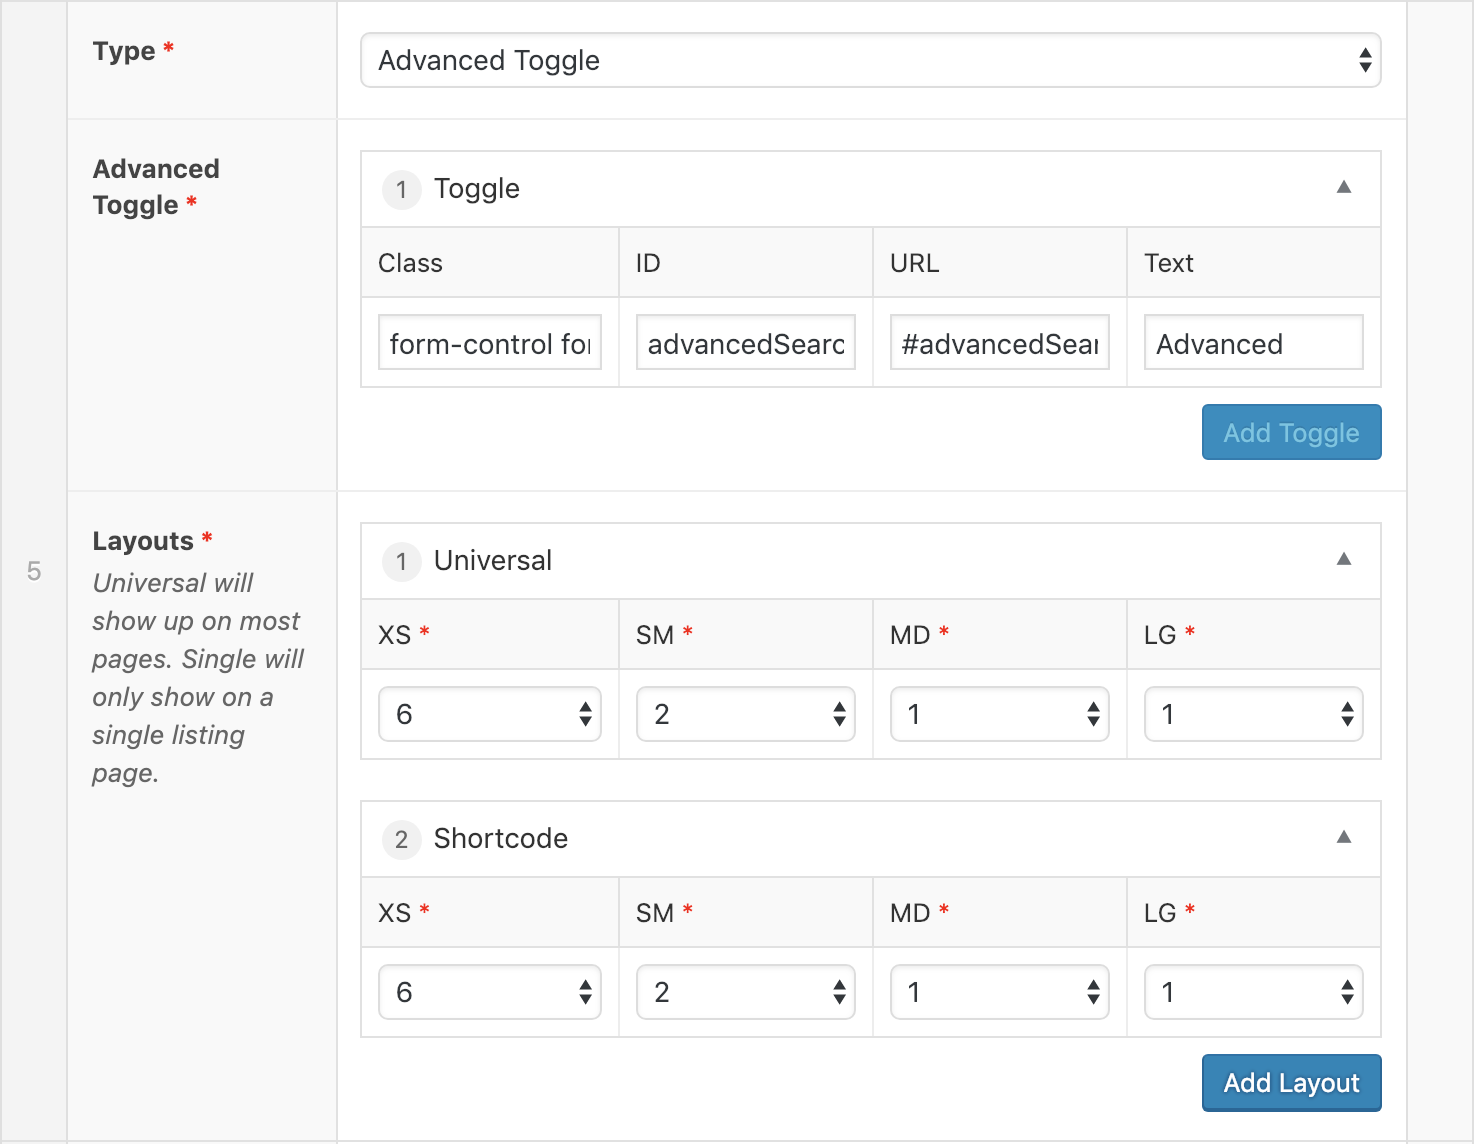
- Advanced Toggle: Use this when you want to a user to be able to toggle advanced search options.
- Advanced Toggle: Click Add Toggle and Select “Toggle”. Then fill in:
- Class: form-control form-group
- ID: advancedSearchButton
- URL: #advancedSearch
- Text: Advanced
- Set up Universal and Shortcode Layouts.

- Advanced Toggle: Click Add Toggle and Select “Toggle”. Then fill in:
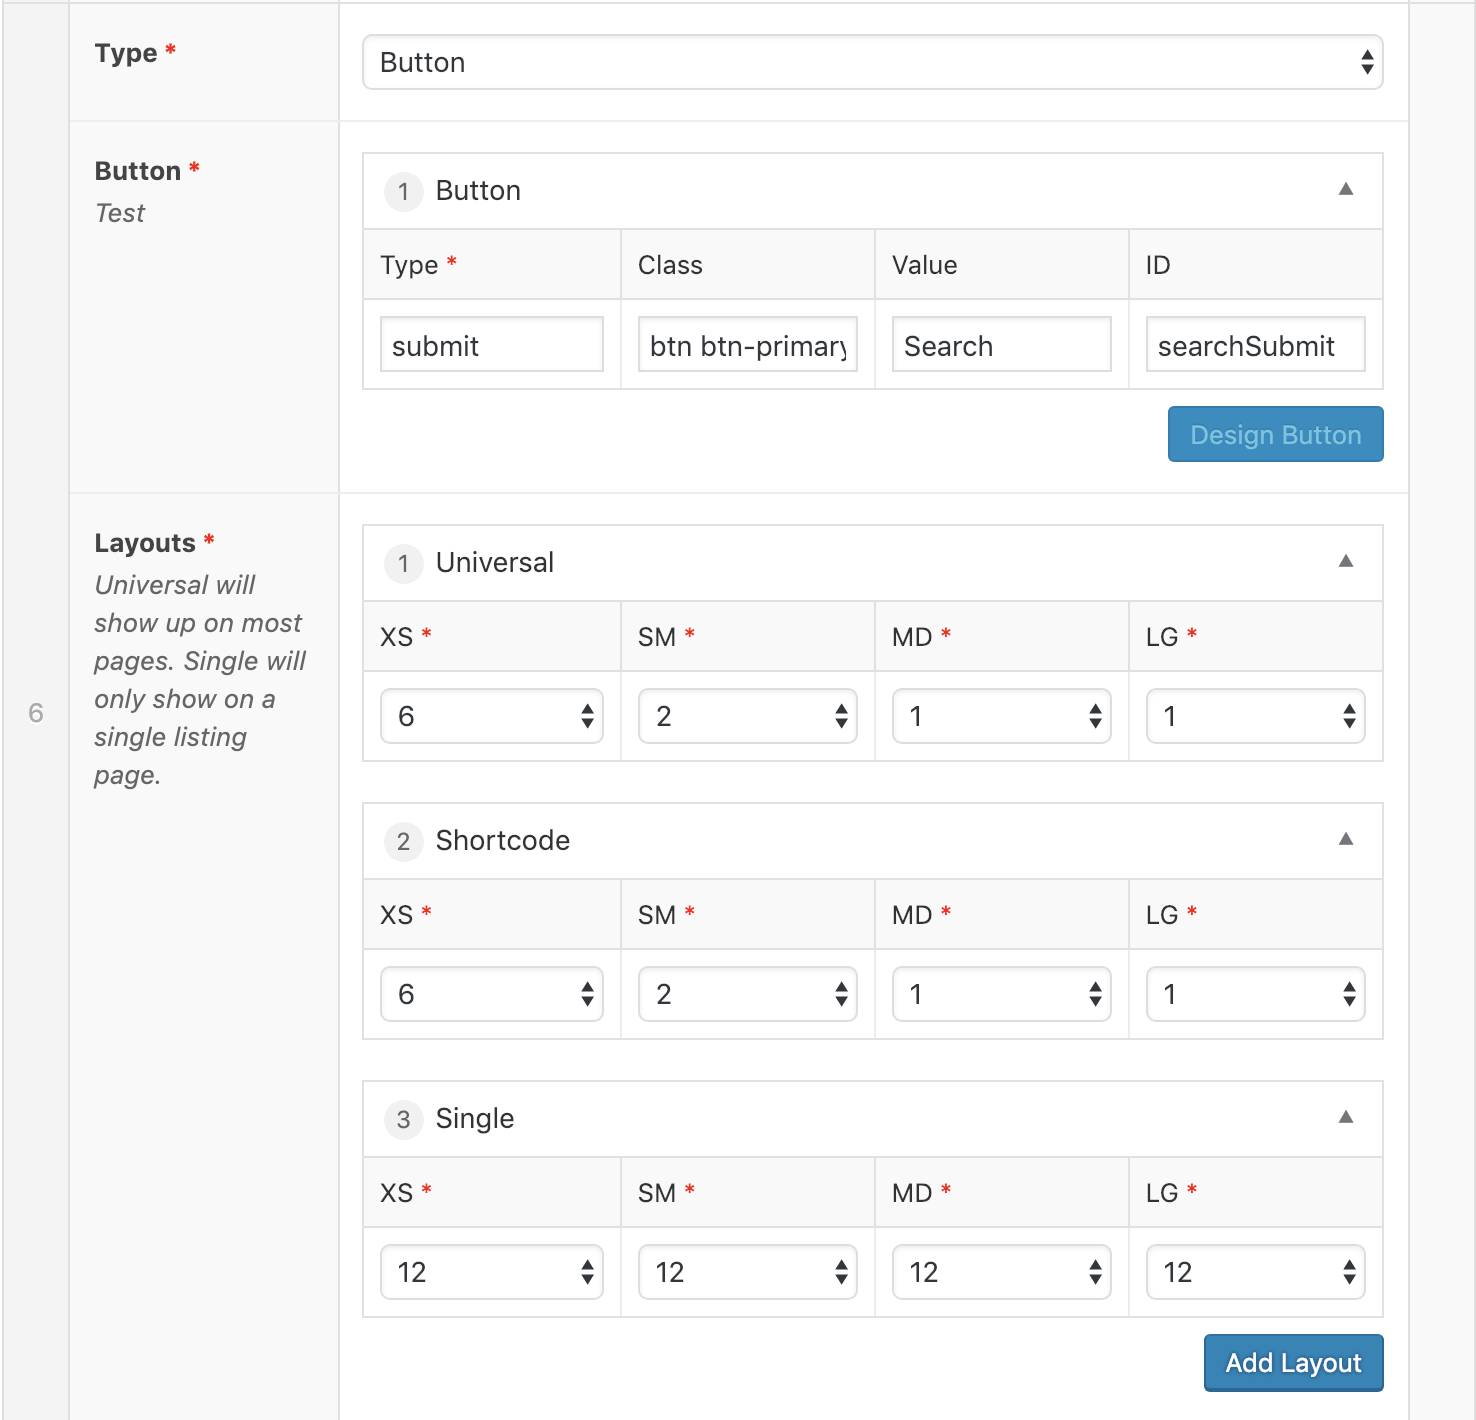
- Button: Use this for your submit button.
-
- Button: Click Design Button and select Button.
- Type: submit
- Class: btn btn-primary btn-block
- Value: Search
- ID: searchSubmit
- Button: Click Design Button and select Button.

-
- Datepicker: Set this up in your Basic Search tab with all of the Layouts.

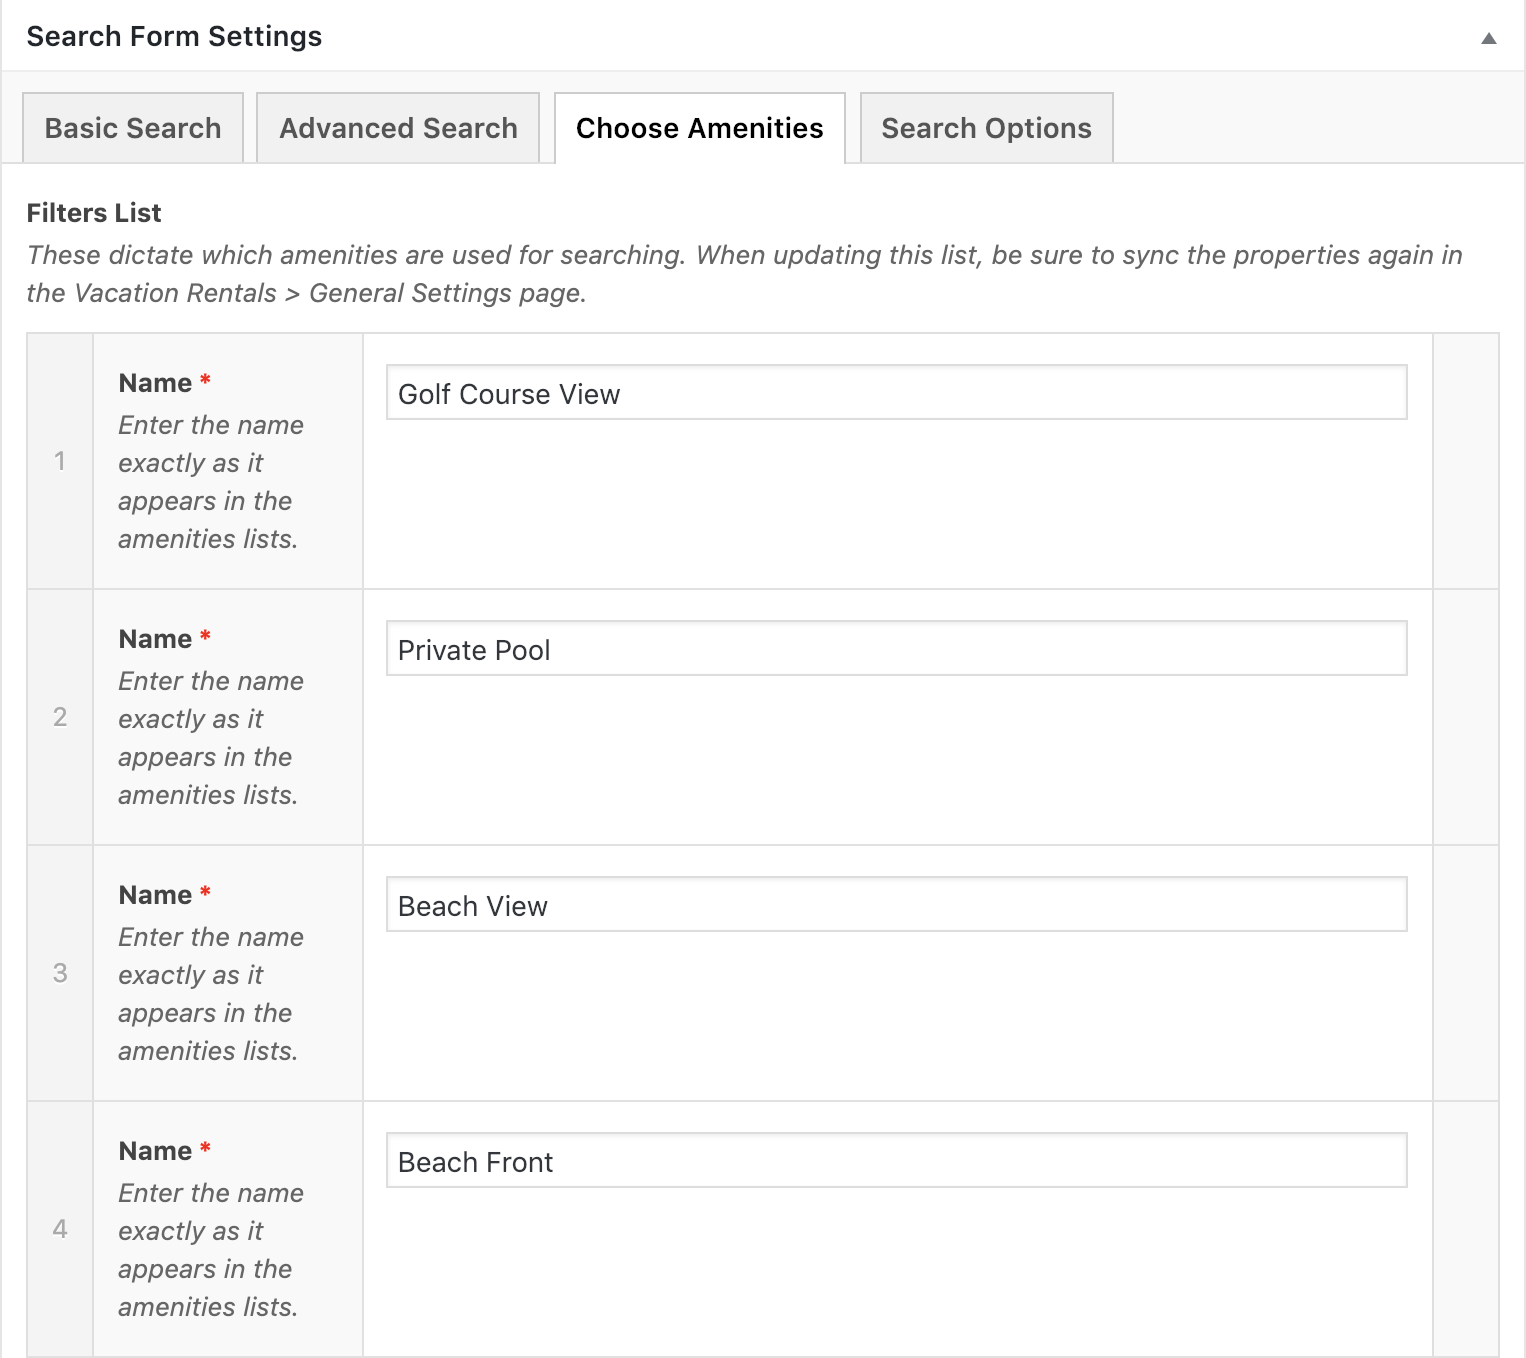
Choose Amenities
This is where you add the filters you want to apply to the properties (you can also add them under Vacation Rentals > Filters, but I find this easier). Add the exact name of the Amenity as it is returned from the PMS API in the amenities data if you want it to be automatically applied to the unit during the Sync process. You can add other filters here as well, but you will have to click those manually on each property they apply to.
Search Options
This will generally stay checked unless Stephen is moving the search form shortcode.
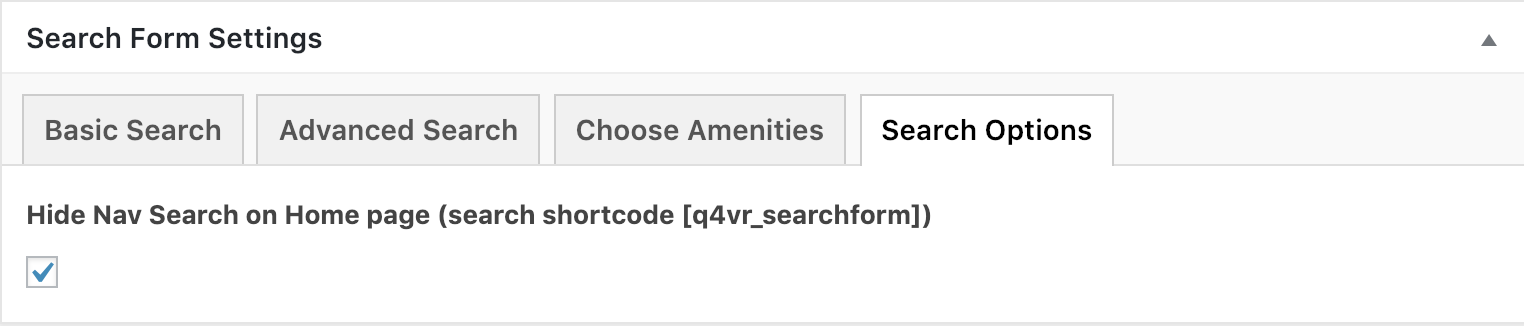
If the VR Search Bar is designed to be over the hero image, the above shortcode will go within the text field on the Hero Image Slide. However, if your client is using multiple Hero Images DO NOT copy the shortcode ([q4vr_searchform]) to the other hero image slides. You only need it on the first Hero Image slide.